


Who can do this: Owner, Administrator and Programs. Finance, Fundraiser, Front desk and Viewer can open buildings and spaces and read them, but don't see the "Add building", "Add space", "Add extra", "Add photo" or save buttons.
Quick steps: Rentals › "Buildings" › "Add building" › "Name" and "Legal entity" › "Add building" › fill in "Details" and "Opening hours" › "Save building". Then "Add space" › "Name" › "Add space" › fill in "Settings" › "Save space" › "Add photo". Add a rate, then set "Status" to "Published" › "Save space".
Before you start
- You need the Owner, Administrator or Programs role.
- Rentals must be switched on. See Turn Rentals on and choose your rental settings.
- Your organization needs a payment account, and its Stripe setup must be finished before a space can be published. See Add a payment account, connect Stripe and set your payout schedule.
- Have ready: the building's address and opening hours, each room's name and how many people it holds, any extras and their prices, and photos (JPEG, PNG, GIF or WebP files).
- A building is a place you rent rooms in. A space is one room or area people can rent, such as "Whole Hall".
- The legal entity is the payment account the building's rental income goes to.
- An extra is something a renter can add for a price, such as round tables or a projector.
Add a building
Page: /dashboard/rentals/venues
- In the left-hand menu, under "Programs & Sales", click "Rentals".
- In the row of tabs under the "Rentals" heading, click "Buildings".
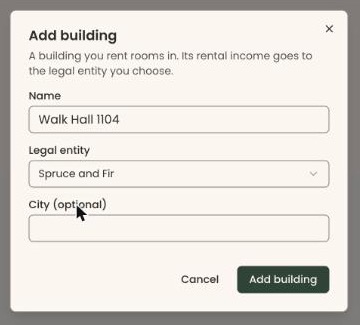
- At the top right of the page, click "Add building". A box opens called "Add building".
- In "Name", type the building's name, for example "Oak Street Building".
- Click the box under "Legal entity" and choose the payment account this building's income goes to.
- In "City (optional)", type the city if you like.
- At the bottom right of the box, click "Add building". It stays grayed out until "Name" and "Legal entity" are filled in.
- The building's own page opens, with its name and "Active" at the top. That means it worked.
If you see "The building could not be added." or another message in red, the building wasn't saved. Read the message, fix the field and try again.
Fill in the building's details and opening hours
Page: /dashboard/rentals/venues/<venueId>
- On the building's page, find the box headed "Details".
- Check "Name" and "Legal entity". Leave "Web address" and "Status" as they are.
- Under "Address", type the street in the first line. Use the second line ("Suite, floor (optional)") if needed.
- Fill in "City", "State" and "ZIP code".
- In "Description", type a short description of the building, if you like.
- Under "Opening hours", check the box next to each day the building is open. Days left unchecked show "Closed".
- Checking a day fills in an opening and a closing time. Change the two times to your real hours. The line above the days shows the time zone they are in.
- At the bottom right of the "Details" box, click "Save building".
- You'll see "Building saved". That means it worked.
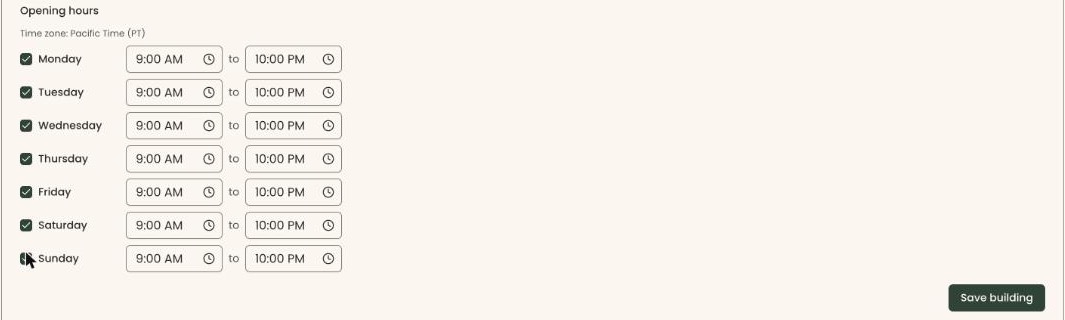
If you see "On Monday, closing time must be after opening time." (with the day's name), fix that day's times and click "Save building" again. Opening hours can't run past midnight.
Add extras
Page: /dashboard/rentals/venues/<venueId>
- On the building's page, scroll to the box headed "Extras".
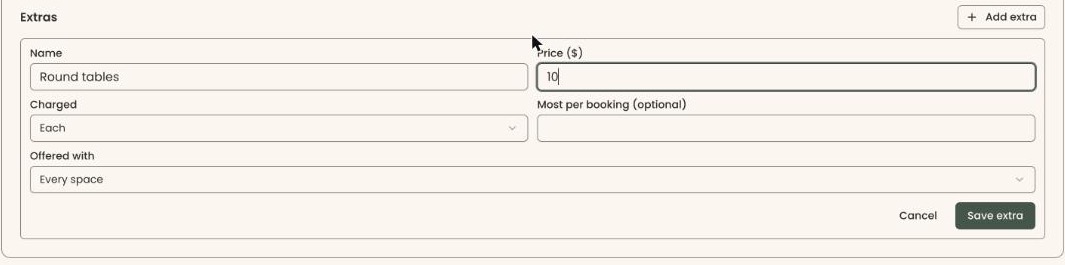
- At the top right of that box, click "Add extra". A small form opens in the box.
- In "Name", type the extra, for example "Round tables".
- In "Price ($)", type the price, for example 10.
- Click the box under "Charged" and choose "Each", "Per hour" or "Flat fee".
- In "Most per booking (optional)", type the most a renter can order, if there is a limit.
- Under "Offered with", leave "Every space", or choose one space followed by "only".
- Click "Save extra".
- The form closes and the extra shows in the list, for example "Round tables $10.00 each · Every space". That means it worked.
To change an extra, click "Edit" at the right of its row. To stop offering it, click "Archive". "Restore" brings it back.
Add a space
You can add a space from the building's page or from the "Spaces" tab.
Page: /dashboard/rentals/venues/<venueId>
- On the building's page, find the box headed "Spaces".
- At the top right of that box, click "Add space". A box opens called "Add space". It says the space starts as a draft.
- In "Name", type the space's name, for example "Whole Hall".
- Click "Add space" at the bottom right of the box.
- The space's own page opens, with its name and "Draft" at the top. That means it worked.
From the "Spaces" tab instead: click "Add space" at the top right, choose the building in "Building", type the "Name" and click "Add space". The button is grayed out until you have an active building.
A draft space is saved but renters can't see it yet.
Set the space's booking rules
Everything in the "Settings" box is saved together by one button at the bottom: "Save space".
Page: /dashboard/rentals/spaces/<spaceId>
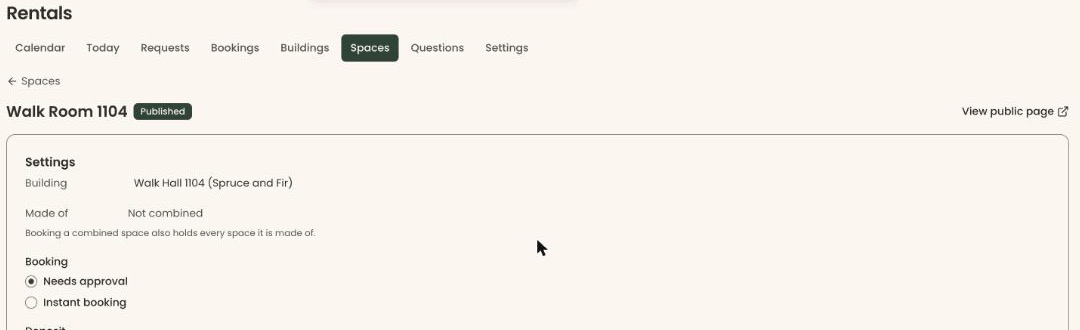
- On the space's page, find the box headed "Settings". At the top it shows the "Building".
- Under "Booking", choose one:
- "Needs approval": the renter sends a request, and you approve or decline it.
- "Instant booking": the renter books and pays without waiting for you.
- Under "Deposit", choose one:
- "Refundable $": type the deposit amount in the box next to it, for example 200.
- "None, card saved": no deposit. The renter's card is saved instead. New spaces start on this choice.
- In "Balance due", type how many days before the booking the balance is due, for example 14. Leave it blank to make it due when the renter confirms.
- Under "Weekly bookings", choose how a booking that repeats every week is charged. "Charge each date before it (using balance due days)" is marked "(default)".
- In "Setup" and "Cleanup", type the minutes held before and after each booking for setting up and clearing away, for example 30.
- In "Setup days" and "Cleanup days", type any whole days to hold before the first day and after the last. Leave them at 0 if you don't need them. The most is 30 days each.
- In "Shortest booking", type the fewest minutes someone can book, for example 120. Leave it blank for no minimum.
- Check "Insurance required" if renters must give you an insurance certificate.
- Under "Request form: renter's address", choose "Ask for it (optional)", "Ask for it (required)" or "Don't ask".
- Check or uncheck "Request form: offer the optional "Additional Information" section".
- "Agreement" and "Cancellation terms" come next. They have their own guide: Require an agreement, insurance and cancellation terms for a space. You can leave them for now.
- Check "Name". Leave "Web address" as it is unless you want a different link for this space.
- Fill in "Seats", "Standing" and "Theater seating" with how many people the space holds each way. Leave any that don't apply blank.
- In "Amenities", type what the space has, separated by commas, for example "Kitchen, stage, projector".
- In "Description", describe the space for renters.
- Leave "Status" on "Draft" for now.
- At the bottom right of the "Settings" box, click "Save space".
- You'll see "Space saved". That means it worked.
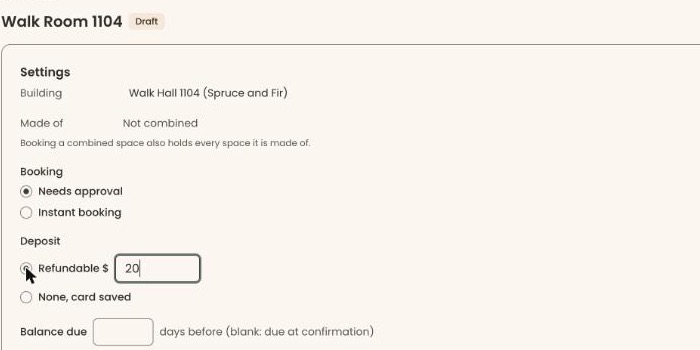
If you see "A refundable deposit needs an amount greater than $0.", type the deposit amount next to "Refundable $", or choose "None, card saved".
If you see "That web address is already used by another space." or "The web address can use only lowercase letters, numbers and single dashes.", change "Web address" and save again.
Combine spaces
Use this when one space is made of others, for example "Whole Hall" is "Hall A" plus "Hall B". Add the smaller spaces first.
Page: /dashboard/rentals/spaces/<spaceId>
- Open the larger space's page. At the top of the "Settings" box, find "Made of". It says "Not combined".
- Click "+ Add a space" next to it and choose a space in the same building.
- It saves right away and the space's name appears next to "Made of". That means it worked.
- Repeat for each part.
Booking a combined space also holds every space it is made of. To take a part off, click the small "x" on its name.
Add photos
Page: /dashboard/rentals/spaces/<spaceId>
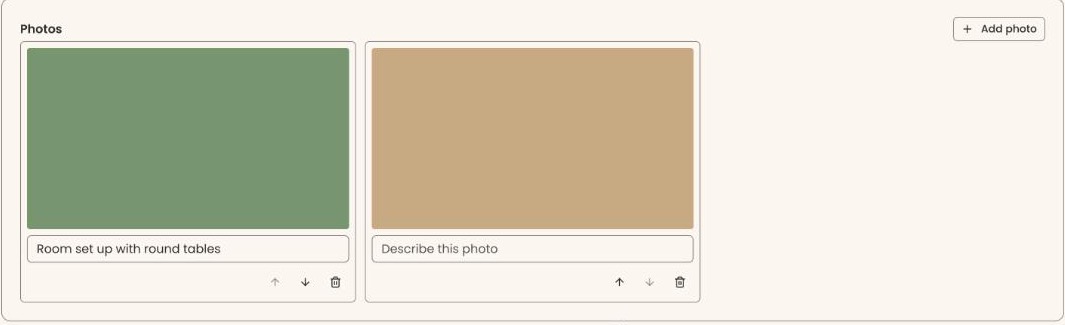
- On the space's page, scroll to the box headed "Photos".
- At the top right of that box, click "Add photo". Your computer's file window opens.
- Choose a JPEG, PNG, GIF or WebP picture and click "Open". The button says "Uploading…" for a moment.
- The photo appears in the box. That means it worked.
- In "Describe this photo" under the picture, type a short description, for example "Hall set up with round tables". It saves when you click somewhere else.
- To change the order, use the up arrow ("Move earlier") and down arrow ("Move later") under each photo.
A space can have up to 20 photos. If you see "A space can have at most 20 photos.", remove one first.
Important: The trash can under a photo removes it at once, with no question first.
- To remove a photo, click the trash can under it.
Publish the space
A space needs at least one rate before it can be published. See Set rates and member pricing.
Page: /dashboard/rentals/spaces/<spaceId>
- On the space's page, in the "Settings" box, click the box under "Status".
- Choose "Published".
Important: Once you save, the space appears on your public rental pages, and renters can request it (or book it right away, if it uses "Instant booking").
- Click "Save space".
- You'll see "Space saved", and the badge at the top changes to "Published". A "View public page" link appears at the top right. That means it worked.
If it didn't work, a message in red explains why:
- "Add a rate before publishing this space." Add a rate first.
- "This space can't go live yet: the payment account … can't accept payments until its Stripe setup is complete. Finish it in Settings > Payment Accounts, then try again."
- "This building is archived, so its spaces cannot be published."
Special cases
- "Booking limits". The box under "Settings", on both the building's and the space's page, has its own guide: Edit the renter questions and set booking limits.
- A space can't move to another building. Add it again in the other building instead.
- Archiving a building. Set its "Status" to "Archived" and click "Save building". If you see "This building still has published spaces. Unpublish or archive them first.", change those spaces' "Status" first.
- "Add space" is grayed out on the "Spaces" tab. You have no active building yet. Add one first.
Buttons to avoid
- The trash can under a photo removes the photo right away.
- "Archive" next to an extra stops it being offered. Use "Edit" to change it.
If you make a mistake
- Buildings and spaces can't be deleted in the screens. To take one out of use, set its "Status" to "Archived" and save.
- A space published too early: set "Status" back to "Draft" and click "Save space". Renters can no longer see it.
- A photo removed by mistake: upload it again with "Add photo".
- An extra archived by mistake: click "Restore" on its row.