


Who can do this: Anyone with the link. Families don't need a login.
Quick steps: open the class link › "Register — $…" › "Your Information" › "Continue" › "Registrant Information" › "Continue" › "Waivers" and "Application" if the class has them › "Review & Pay" › "Pay $…" › card details › "Complete Payment" › "Registration confirmed!"
Before you start
- The class must be published. On the class's page in Clerestory, its badge says "Open". See Create a class, and edit, clone, cancel or archive it.
- Families reach a class from its link, or from a class catalog, which lists several classes on one page. See Build a class catalog.
- A registrant is each person taking the class, for example a child. The person filling in the form (often a parent) pays and gets the emails.
Find a class in a catalog
Page: /forms/class-catalogue/<orgSlug>/<catalogSlug>
- Open the catalog link.
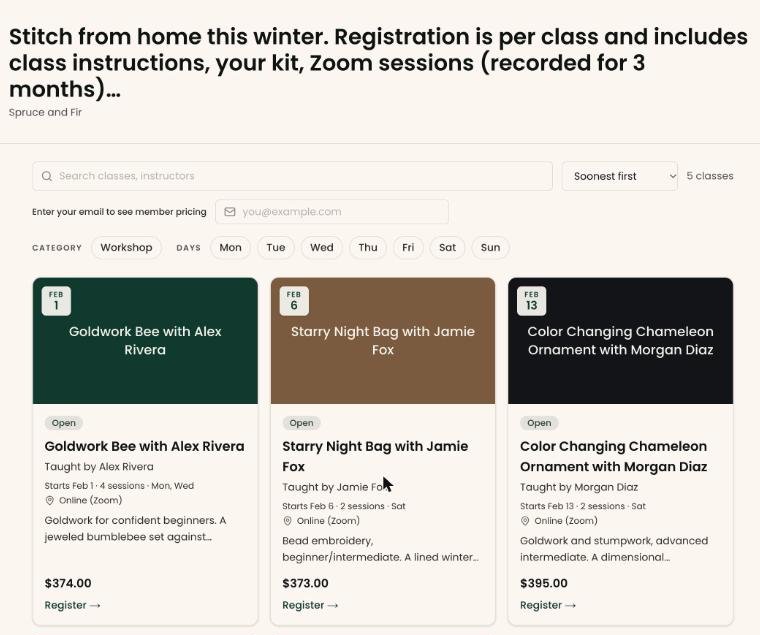
- To narrow the list, type in "Search classes, instructors", or click a button in the "Category", "Ages" or "Days" row, for example "Workshop" or "Sat". Only the rows that fit the catalog's classes appear.
- To change the order, use the sort box, for example "Soonest first" or "Price: low to high".
- Members can type their email in "Enter your email to see member pricing" to see their prices on the cards.
- Each card shows the class's status, for example "Open", "2 spots left", "Waitlist available" or "Sold out".
- Click a class's card. The class page opens.
If nothing matches, the page says "No classes match your filters." If the catalog has no classes, it says "No classes available right now."
The class page
Page: /forms/class/<orgSlug>/<classSlug>
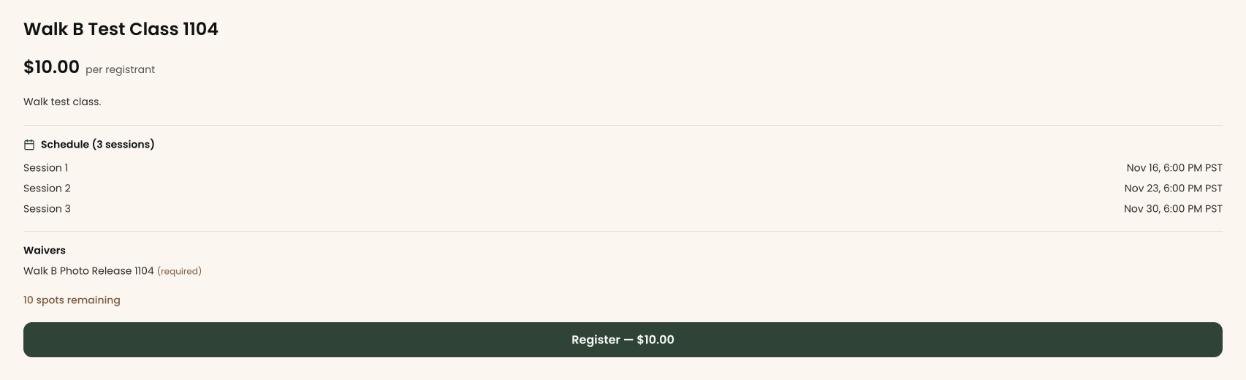
- The page shows the class name, description, schedule, the price "per registrant", and who can attend, for example "Ages 6–10".
- Any waivers are listed by name. "(required)" means the family must agree to it before paying.
- It says how many places are left, for example "10 spots remaining". When none are left, this line doesn't show.
- Click the green button "Register — $…" at the bottom.
Instead of the button, the family may see:
- "Registration opens …" with a date: registration hasn't started yet.
- "Registration is closed.": the registration window has ended.
- "This class is full and waitlist is not available.": no places, and no waitlist.
Step 1: Your Information
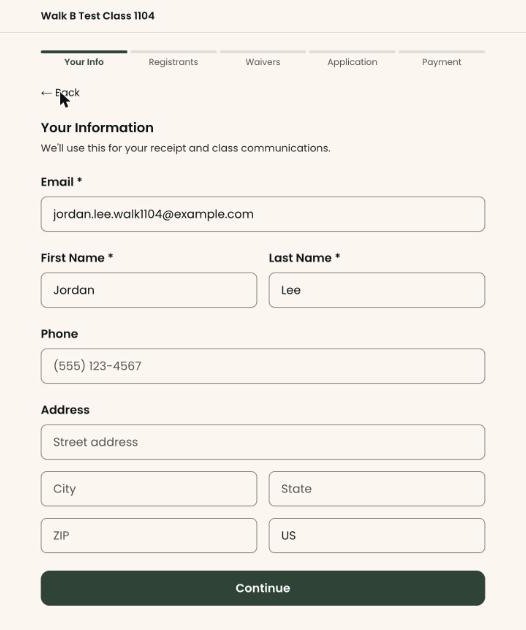
- The page says "Your Information". This is the person registering and paying.
- Type "Email", "First Name" and "Last Name". These three are required.
- "Phone" and the address are optional.
- If the email belongs to a member and the class has a member price, a note says "Welcome back … — Member price applied".
- Click "Continue".
If something is missing, a message says what, for example "Email is required" or "Please enter a valid email address".
Step 2: Registrant Information
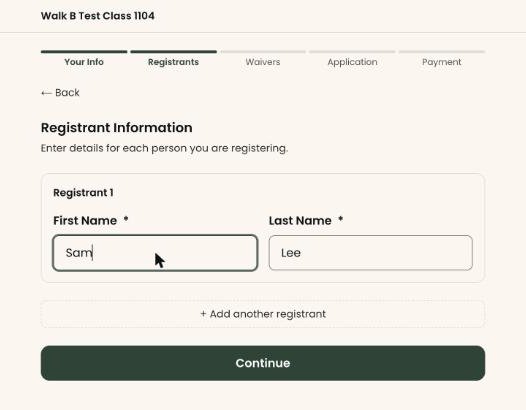
- The page says "Registrant Information" and shows a box called "Registrant 1". It starts filled in with the name from step 1.
- If the person taking the class is someone else, for example a child, change the name. Fill in the other fields. Which ones appear depends on the class, for example "First Name", "Last Name", "Date of Birth" and "Guardian Name".
- To register another person, click "+ Add another registrant" and fill in "Registrant 2".
- To take one out, click "Remove" at the top right of their box.
- Click "Continue".
If something is missing, a message says what, for example "First name is required" or "Date of birth is required for age verification".
Step 3: Waivers (only if the class has one)
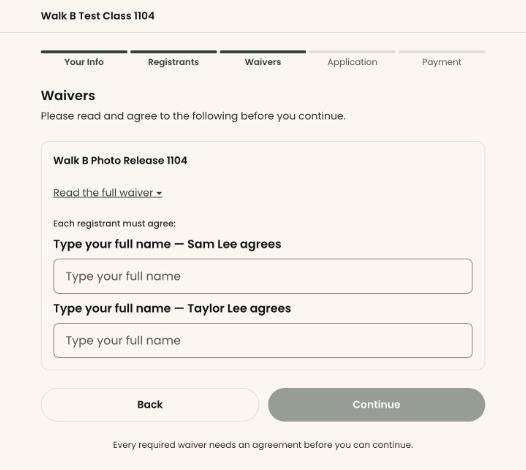
- The page says "Waivers" and "Please read and agree to the following before you continue."
- To read a waiver, click "Read the full waiver". Some waivers open as a PDF: "Read the full waiver (PDF)".
- Agree as the waiver asks: check the box (for example "I agree for my order" or "Jordan Lee agrees"), or type a full name in "Type your full name".
- A waiver marked "(optional)" can be left blank.
- Click "Continue". It can't be clicked until every required waiver is agreed to. Until then the page says "Every required waiver needs an agreement before you can continue."
Step 4: Application (only if the class asks questions)
- The page says "Application" and "Please answer the following questions to complete your application."
- Answer each question.
- Click "Continue".
The application doesn't hold up the registration. The registration is complete once they pay.
Step 5: Review & Pay
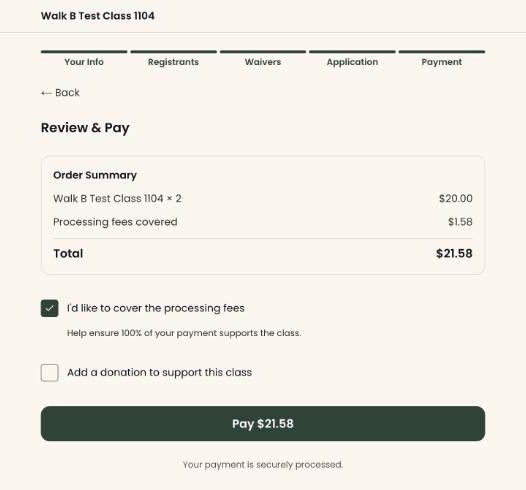
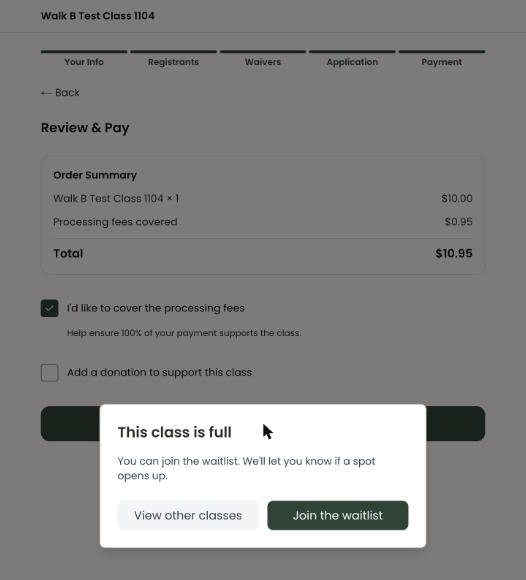
- The page says "Review & Pay". "Order Summary" lists the class, the number of registrants and the total.
- "I'd like to cover the processing fees" starts checked. Uncheck it to pay only the class price.
- To give extra, check "Add a donation to support this class" and pick or type an amount.
- Click "Pay $…". For a free class, the button says "Complete Registration" and they go straight to the confirmation.
- The page now says "Payment". Click "Card" (the other choice is "US bank account"), then type the card number, expiration date, security code and ZIP code.
- A box "Save my information for faster checkout" may appear, already checked. It's optional: uncheck it to skip saving the card.
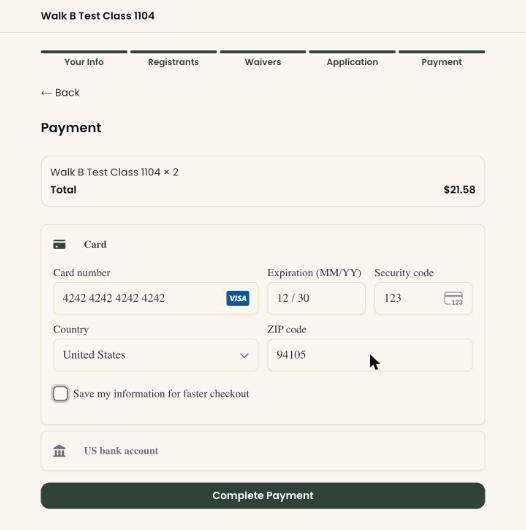
Important: "Complete Payment" charges the card right away.
- Click "Complete Payment".
If payment fails, the page shows the reason, for example "Payment failed" or "Something went wrong. Please try again." Nothing is charged until "Complete Payment" succeeds.
Step 6: Confirmation
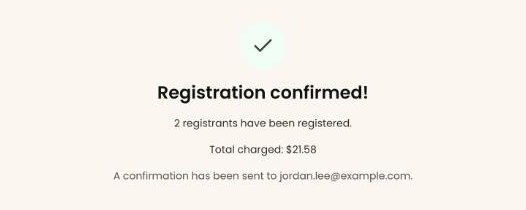
- The page says "Registration confirmed!" and, for example, "Jordan has been registered for Spring Pottery." For more than one person it says, for example, "2 registrants have been registered."
- It shows "Total charged:" and "A confirmation has been sent to …" with the email from step 1.
When the class is full
If the class has a waitlist, the family can still start registering. When they click "Pay $…":
- A box opens: "This class is full". It says "You can join the waitlist. We'll let you know if a spot opens up."
- To wait for a place, click "Join the waitlist". Nothing is charged.
- The page says "You're on the waitlist!" and their place in line, for example "You're #2 on the waitlist".
- "View other classes" closes the box without joining.
If a place opens, the family gets an email offering it. The link opens the class page with the note "You've been offered a spot in …. Complete checkout to claim it." They have 24 hours to finish checkout. To offer places, see Email or export a class roster, and offer a place to someone on the waitlist.
Special cases
- "← Back" at the top of each step goes back one step. On the "Waivers" step it is a "Back" button next to "Continue" instead.
- If the waitlist offer has run out, the page says "This waitlist offer has expired. The spot has been offered to the next person on the waitlist."
- If the hold on their places runs out while paying, the page asks them to pay again: "Pay again to reserve them."
If you make a mistake
A family can't change or cancel a registration on these pages. Staff can do it from the class's "Roster" tab: see Cancel, refund or transfer a class registration.