


Who can do this: Owner, Administrator and Programs. Front desk, Finance, Fundraiser and Viewer users can open a class but can't change it.
Quick steps: Programs & Sales › Classes & Camps › Classes › "New class" › name it › "Create class" › fill in the tabs › "Save changes" › "Settings" tab › "Status" › "Published"
Before you start
- You need an Owner, Administrator or Programs login.
- Have ready: the class name, the session dates and times, the price, and the most people it can take.
- New classes start as a draft. A draft is a class only your team can see. Nobody can register until you publish it.
- A class is anything people register for in advance: a class, camp or workshop.
Create the class
Page: /dashboard/classes
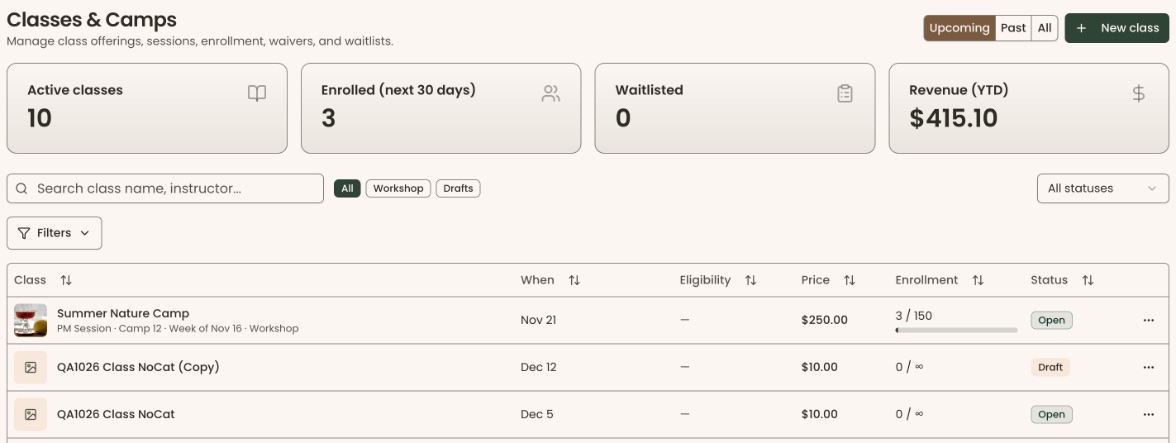
- In the left-hand menu, under "Programs & Sales", click "Classes & Camps". Then click "Classes" in the list that opens below it.
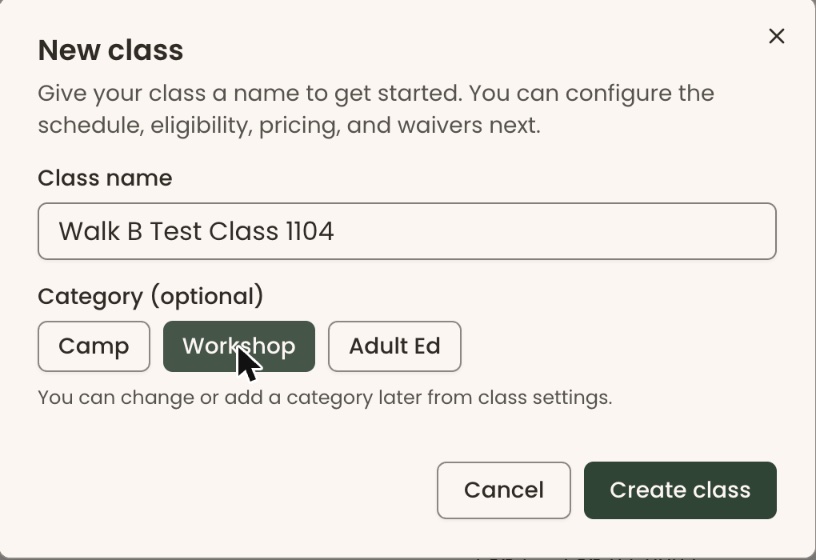
- At the top right of the page, click "New class". A box opens called "New class".
- In "Class name", type the name, for example "Spring Pottery Class".
- Under "Category (optional)", click "Camp", "Workshop" or "Adult Ed" if one fits. You can leave it blank.
- Click "Create class".
- The class's own page opens, with a "Draft" label next to its name. That means it worked.
If it didn't work, you'll see "Failed to create class. Please try again." Click "Create class" again.
Fill in the details
Page: /dashboard/classes/<classId>
The class page has a row of tabs near the top. Changes on most tabs are kept until you click "Save changes" at the top right of the page.
- On the "Overview" tab, fill in "Card summary", "Full description", "Instructor name" and "Location name" as you need.
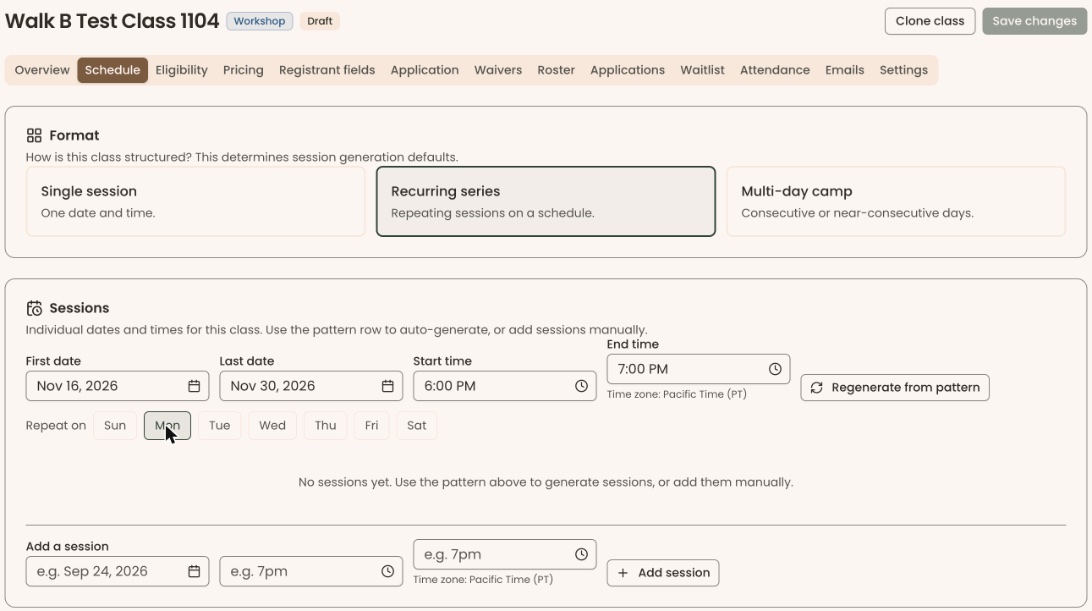
- Click the "Schedule" tab. Under "Format", click "Single session", "Recurring series" or "Multi-day camp".
- At the top right of the page, click "Save changes". You'll see "Changes saved.".
- Under "Sessions", fill in the dates and times. For a single session: "Date", "Start time" and "End time", then click "Add session". You'll see "Session added.".
- For a series or camp: fill in "First date", "Last date", "Start time" and "End time". Next to "Repeat on", click each day of the week it meets, such as "Mon". Then click "Regenerate from pattern". You'll see "Sessions regenerated from pattern.", and the sessions are listed below.
- Under "Registration window", pick the "Registration opens" and "Registration closes" dates.
- Click the "Eligibility" tab. Under "Capacity", type the most people it can take in "Maximum enrollment".
- Click the "Pricing" tab. Under "Base Price", type the price in "Price (USD)". Leave it at 0 for a free class.
- At the top right of the page, click "Save changes".
- You'll see "Changes saved.". That means it worked.
If it didn't work, you'll see the reason, or "Failed to save changes.". Fix what it names and click "Save changes" again.
Sessions are saved as soon as you click "Add session" or "Regenerate from pattern". Everything else waits for "Save changes".
Open it for registration (publish)
- Click the "Settings" tab.
- Scroll down to the "Class status" box. At its right, click the "Status" box. It shows "Draft".
Important: publishing makes the class's public page live, so anyone with the link can register.
- Click "Published".
- You'll see "Class published.". The label next to the class name now says "Open". That means it worked.

If you have unsaved changes, a box opens called "Publish with unsaved changes?". Click "Save changes and publish" so the public page matches what you see.
If it didn't work, you'll see the reason, or "Failed to update class status.". For a paid class, this can mean your payment account isn't ready to take payments yet.
To take the class off sale again, choose "Draft" in the same "Status" box. You'll see "Class moved to draft.".
Edit a class
- In the list of classes, click the class's name.
- Click the tab with the detail you want to change, and change it.
- At the top right of the page, click "Save changes".
- You'll see "Changes saved.". That means it worked.
Clone a class
Cloning makes a copy of a class with new dates, for example next term's run of the same class.
- Open the class you want to copy.
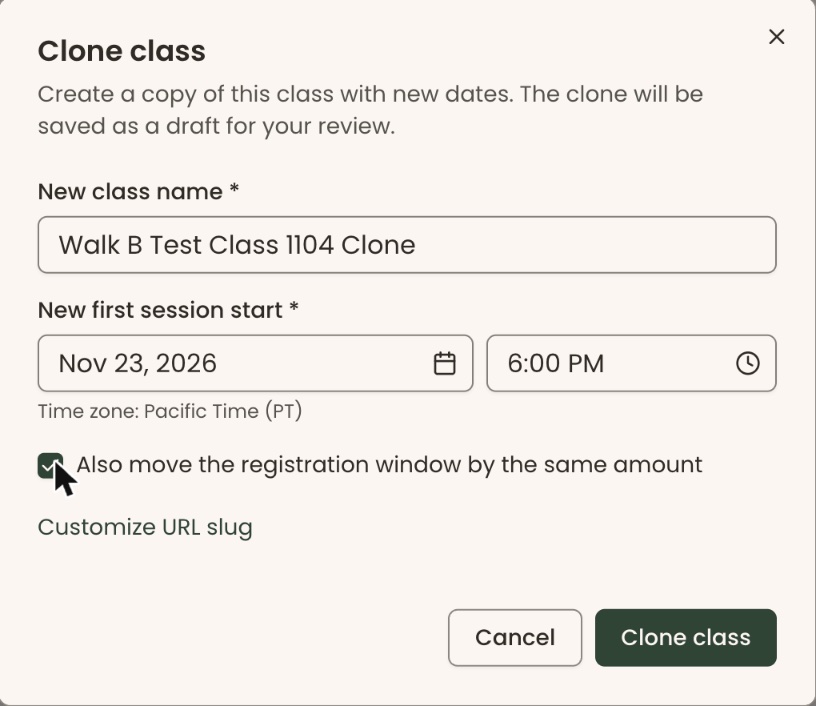
- At the top right of the page, click "Clone class". A box opens called "Clone class".
- "New class name *" is filled in with the name and "(Copy)". Change it, for example to "Spring Pottery Class, Session 2".
- In "New first session start *", pick the date and time of the new first session.
- To move the registration dates by the same amount, check "Also move the registration window by the same amount".
- Click "Clone class".
- You'll see "Class cloned. Redirecting to draft..." and the new class opens as a draft. That means it worked.
- Check its tabs, then publish it as in "Open it for registration" above.
Cancel a class
Use this when the class won't run.
- Open the class and click the "Settings" tab.
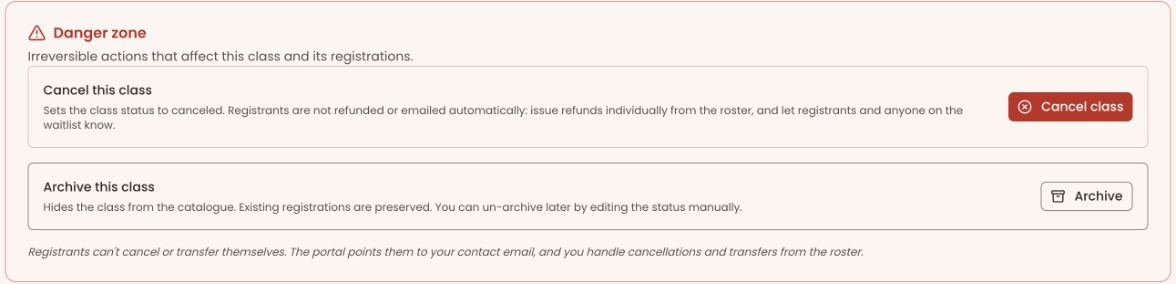
- Scroll to the bottom, to the red "Danger zone" box.
- Next to "Cancel this class", click "Cancel class" (in red). A box opens called "Cancel …?".
Important: canceling does not refund anyone or email anyone. You must refund each registrant from the "Roster" tab, and tell registrants and anyone on the waitlist yourself.
- Click "Yes, cancel class".
- You'll see "Class canceled.". The label next to the class name now says "Canceled". That means it worked.
To refund registrants, see Cancel, refund or transfer a class registration. To email them, use "Email roster" on the "Roster" tab. See Email or export a class roster, and offer a place to someone on the waitlist.
Archive a class
Archiving hides a class you no longer need, for example last year's camp. Its registrations are kept.
- Open the class and click the "Settings" tab.
- In the "Danger zone" box at the bottom, next to "Archive this class", click "Archive".
- A box opens called "Archive …?". Click "Yes, archive class".
- You'll see "Class archived.". That means it worked.
You can also archive from the list of classes: at the far right of the class's row, click the three dots (⋯), then "Archive". This archives at once, with no box. You'll see ""…" archived".
Special cases
- "Preview public page" appears at the top right only once the class is published.
- The status label in the list says "Open" for a published class.
- To find an archived class in the list, click "All" at the top right. Archived classes show "Archived" in the "Status" column. To see only them, choose "Archived" in the "All statuses" box above the table.
Buttons to avoid
- "Keep class" and "Keep visible" close the box without changing anything.
If you make a mistake
- To bring back an archived class, find it in the list (see "Special cases"). At the far right of its row, click the three dots (⋯), then "Unarchive". You'll see "… restored to draft". Publish it again when ready.
- A canceled class can be set back to "Draft" or "Published" in the "Status" box on the "Settings" tab. Registrations canceled or refunded in the meantime stay that way.
Changes in the next release: you won't be able to set "Maximum enrollment" below the number already enrolled plus any seats held by open waitlist offers.