


Who can do this: Owner, Administrator and Programs. Finance, Fundraiser, Front desk and Viewer users can open "Catalogs", see each catalog and copy its link, but don't see "New catalog", "Edit" or "Archive".
Quick steps: Classes & Camps › Catalogs › "New catalog" › "Name" › "Create" › "Edit" › "Status" › "Active" › "Save Changes". Then each class › "Settings" tab › "Catalog" › pick the catalog.
Before you start
- You need an Owner, Administrator or Programs login.
- The classes should already exist. See Create a class.
- Only published classes appear on a catalog's page. A draft class in a catalog stays hidden until you publish it.
- Have ready: the catalog's name, for example "Fall 2026 Programs", and a short welcome line if you want one.
Create the catalog
Page: /dashboard/classes/catalogs
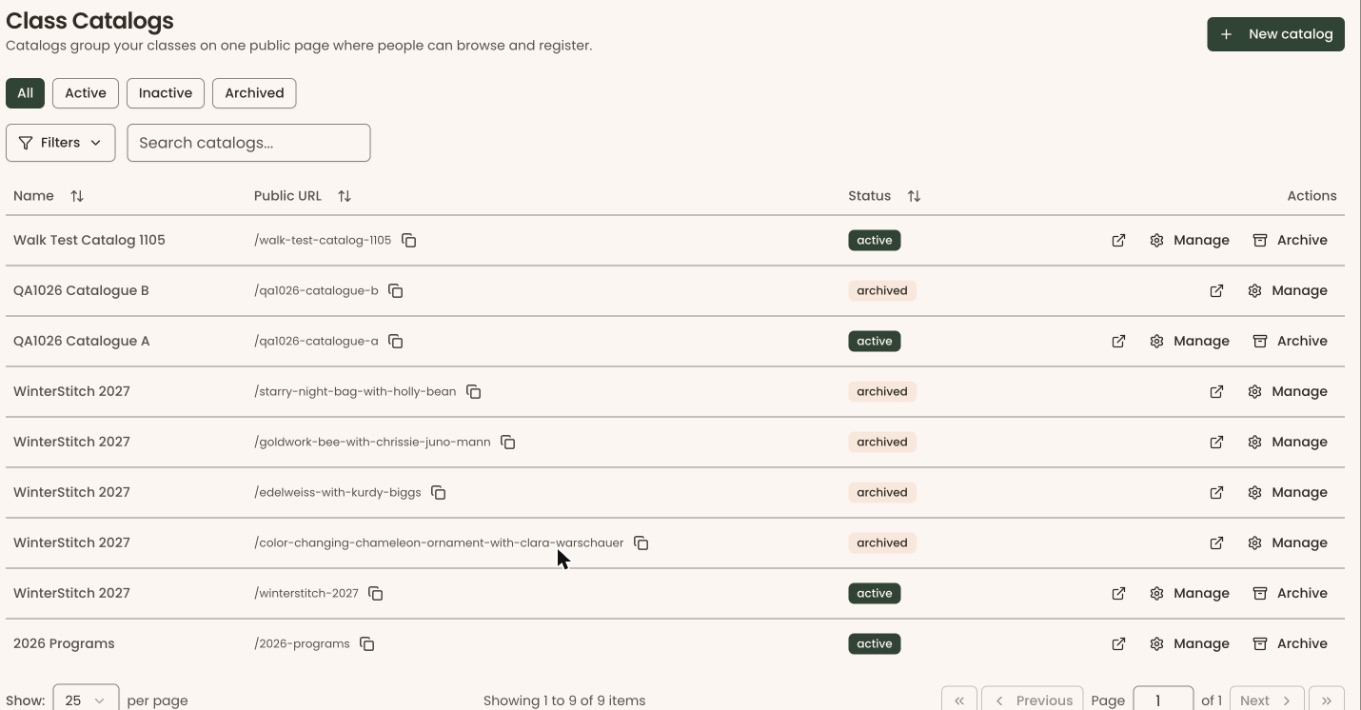
- In the left-hand menu, under "Programs & Sales", click "Classes & Camps". Then click "Catalogs" in the list that opens below it.
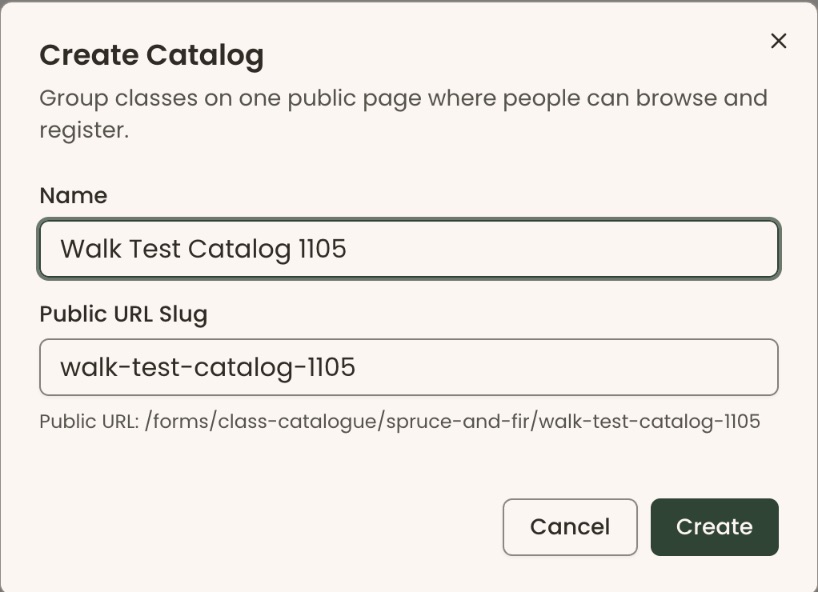
- At the top right of the "Class Catalogs" page, click "New catalog". A box opens called "Create Catalog".
- In "Name", type the catalog's name, for example "Fall 2026 Programs".
- "Public URL Slug" fills itself in from the name, for example "fall-2026-programs". This is the end of the page's web address. You can change it, using lowercase letters, numbers and dashes.
- Click "Create".
- You'll see "Catalog created", and the catalog's own page opens. That means it worked.

A new catalog starts as "Inactive", which means its page isn't public yet. Under "Public link" it says "This link isn't live yet — set the catalog status to Active to make it public."
Add a welcome line and picture
Page: /dashboard/classes/catalogs/<formId>
- On the catalog's page, at the top right, click "Edit".
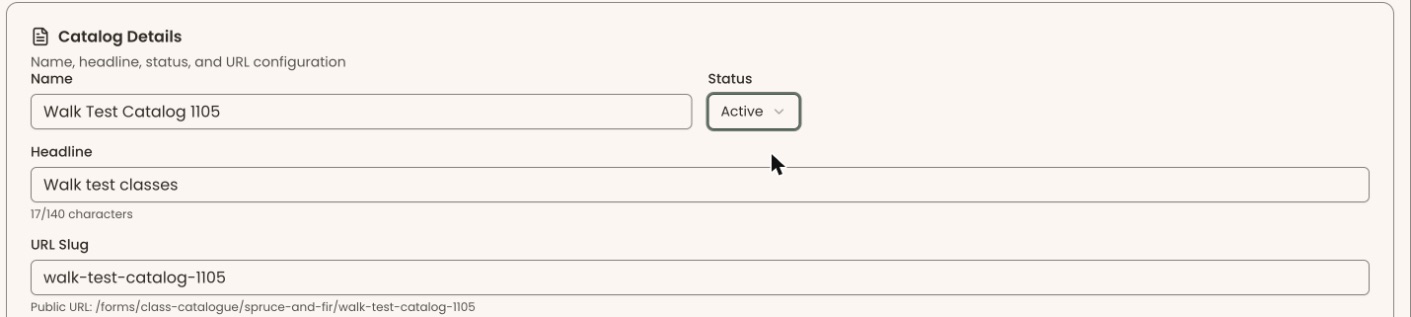
- In "Headline", type a short welcome, for example "Classes for every age this fall". It can be up to 140 characters.
- Under "Branding", you can add a "Hero Image", the wide picture across the top of the page. The suggested size is 1800 × 600 pixels.
- At the bottom of the page, click "Save Changes".
- You'll see "Catalog updated". That means it worked.
The catalog's colors and fonts are also set under "Branding". Classes in the catalog use them unless a class has its own.
Put a class in the catalog
You add classes from each class's own settings, not from the catalog.
Page: /dashboard/classes/<classId>?tab=settings
- In the left-hand menu, under "Programs & Sales", click "Classes & Camps". Then click "Classes" in the list that opens below it.
- Click the class's name.
- Click the "Settings" tab. It is the last tab.
- Scroll down to the box called "Class catalog".
- Click the box to the right of "Catalog" and click the catalog's name.
- You'll see "Class assigned to catalog." That means it worked. It saves right away.
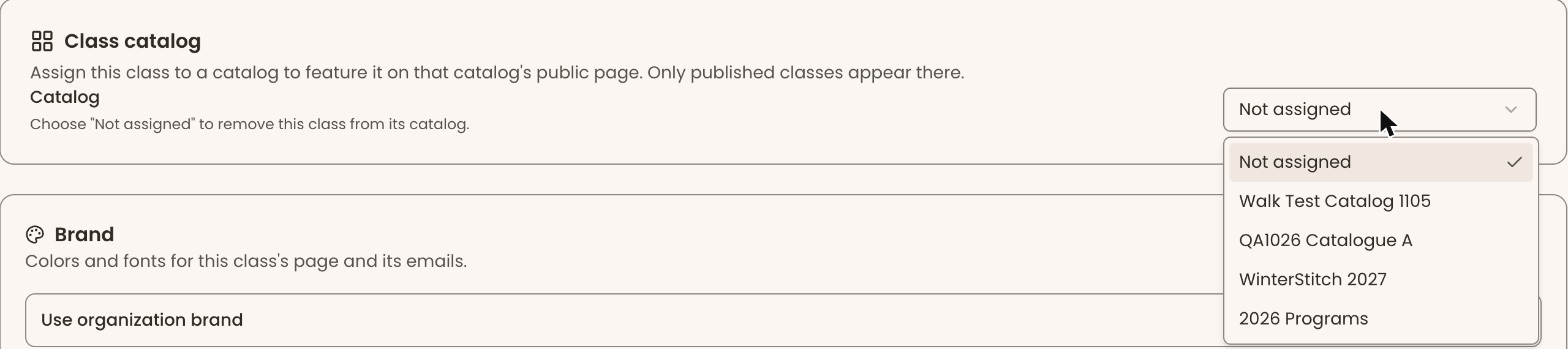
A class can be in one catalog at a time. To take it out, choose "Not assigned" in the same box. You'll see "Class removed from catalog."
Repeat these steps for each class.
Make the catalog live
Important: Once the catalog is "Active", anyone with its link can see its published classes and register.
- On the catalog's page, at the top right, click "Edit".
- Under "Catalog Details", click the box under "Status" and choose "Active".
- At the bottom of the page, click "Save Changes".
- You'll see "Catalog updated". The note under "Public link" goes away. That means it worked.
Share the link
- On the catalog's page, under "Public link", click "Copy" at the right of the "Public URL" box.
- You'll see "Public URL copied". That means it worked. Paste it into an email, a post or your website.
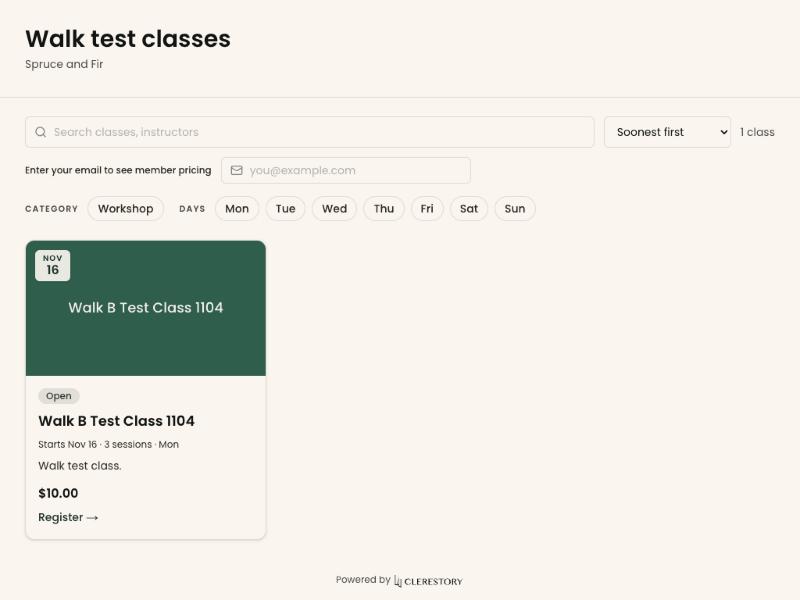
You can also copy it from the "Class Catalogs" page: click the small copy icon in the "Public URL" column of the catalog's row. To look at the page yourself, click the arrow-out-of-a-box icon in the "Actions" column. It opens in a new tab.
To show the catalog inside your own website, use the embed code further down the catalog's page. It only works while the catalog is "Active".
Archive a catalog
Archive a catalog when its season is over.
- On the "Class Catalogs" page, find the catalog's row.
- In the "Actions" column, click "Archive". A box opens called "Archive Catalog".
Important: Once archived, the catalog's public page and embed stop working, and you can't add classes to it. The classes themselves don't change.
- Click "Archive".
- You'll see "Catalog archived". Its "Status" reads "archived". That means it worked.
If you see "Failed to archive catalog", try again.
To see only some catalogs, click "All", "Active", "Inactive" or "Archived" at the top left, above "Filters".
Special cases
- To take a catalog offline for a while without archiving it, set its "Status" to "Inactive" and click "Save Changes".
- "A public URL will appear here once your organization slug is set." Your organization's web address name isn't set up yet, so there's no link to share.
- Kiosk return URL. If you run this catalog on a kiosk, "Kiosk return URL" is the page the kiosk goes back to after each checkout. See Set up the kiosk and its PIN.
- "Manage" on each row of the "Class Catalogs" page opens the catalog's own page.
If you make a mistake
To bring an archived catalog back:
- On the "Class Catalogs" page, click "Archived" above the table.
- On the catalog's row, click "Manage".
- At the top right, click "Edit".
- Under "Status", choose "Active" (or "Inactive").
- Click "Save Changes" at the bottom of the page. You'll see "Catalog updated".
A class put in the wrong catalog can be moved with the "Catalog" box on its "Settings" tab.