


Who can do this: Owner, Administrator, Finance and Fundraiser. Programs, Front desk and Viewer can open the Directory page and see the listings, but every setting is grayed out and they don't see "Add listing" or the edit buttons. Anyone with the link can view the public directory page.
Quick steps: Membership › "Directory" › "Settings" tab › switch on "Enable member directory" › "Save changes". Then "Listings" tab › "Add listing" › search › click the member › fill in › switch on "Published" › "Save changes".
Before you start
- You need the Owner, Administrator, Finance or Fundraiser role.
- "Directory" shows in the menu only while the "Member directory" feature is on. See Turn features on or off.
- Each listing belongs to a supporter already in your records. A supporter is anyone in your records who has given, joined or registered. To add a new person first, see Add a supporter or contact.
- A listing is one business's entry in the directory: its name, logo, description and contact details.
- A listing only shows on the public page when it is published and the supporter has an active membership.
Open the Directory page
Page: /dashboard/membership/directory
- In the left-hand menu, find the Fundraising group and click "Membership" to open it. (If "Directory" already shows under it, skip this step; clicking again closes it.)
- Under "Membership", click "Directory".
- The page "Member Directory" opens on the "Settings" tab. The other tabs, along the top, are "Categories", "Fields" and "Listings".
Turn the directory on and choose its settings
Page: /dashboard/membership/directory
- Open the Directory page. You are on the "Settings" tab.
- Find "Enable member directory" at the top of the "Directory settings" box.
Important: turning the directory on and saving makes the public directory page live for anyone with the link. It also lets members manage their own listing from the supporter portal.
- Click the switch at the right of "Enable member directory" to turn it on.
- In "Page title", type the heading for the public page, for example "Member Businesses". Leave it blank to show no title.
- In "Intro text", type a short welcome for the top of the public page. It is optional, up to 500 characters.
- In "Lapsed membership grace period (days)", type how many days a listing stays published after the member's membership lapses. It can be 0 to 365.
- In "Categories per listing", type how many categories one listing can be in. It can be 1 to 20.
- To show each member's membership level on their listing, turn on "Show membership tier badges".
- At the bottom right of the box, click "Save changes".
- You'll see "Directory settings saved". That means it worked.
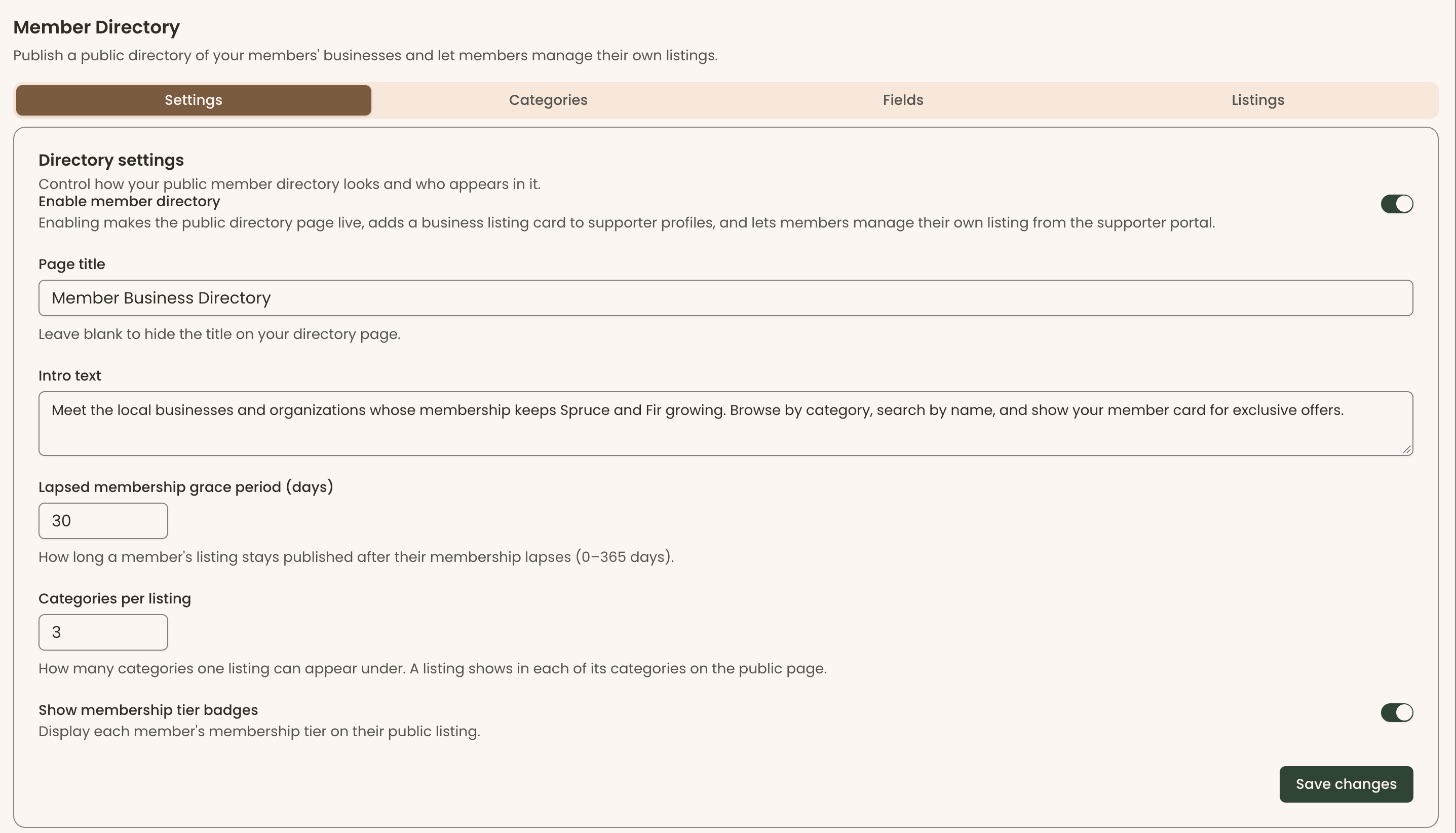
If you see "Grace period must be a whole number between 0 and 365 days." or "Categories per listing must be a whole number between 1 and 20.", correct that box and click "Save changes" again.
Changes in the next release: if your role can't change these settings, the tab says "Your role can see the directory settings but not change them."
Add categories
Categories group listings on the public page, for example "Restaurants" or "Legal services". Members choose a category when they edit their own listing.
Page: /dashboard/membership/directory
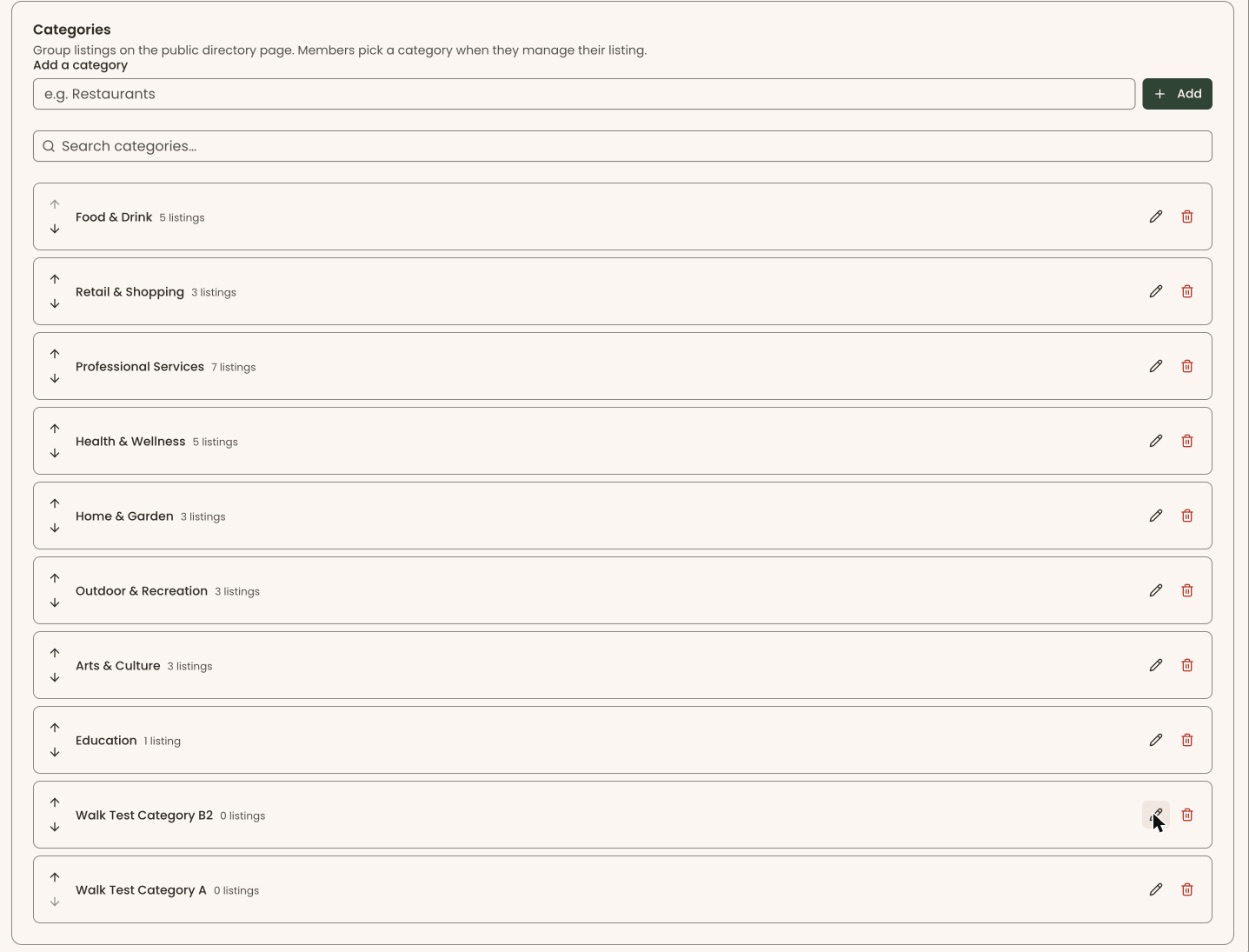
- Open the Directory page and click the "Categories" tab.
- In "Add a category", type the name, for example "Restaurants".
- Click "Add" to the right of the box. You'll see "Category added". That means it worked.
- To change the order, click the small up or down arrow at the left of a category. The public page uses this order.
- To rename one, click the pencil icon at the right of its row. Type the new name, then click the check mark. You'll see "Category renamed".
Each row shows how many listings are in that category.
Important: deleting a category can't be undone. Its listings aren't deleted. They keep their other categories, or have none.
- To delete one, click the trash can icon at the right of its row. A box asks "Delete category?". Click "Delete category".
Add your own listing fields
Use this to collect details the standard listing doesn't have, for example "Certifications".
Page: /dashboard/membership/directory
- Open the Directory page and click the "Fields" tab.
- In the "Custom fields" box, at the top right, click "Add custom field". A new box opens at the bottom of the list of fields.
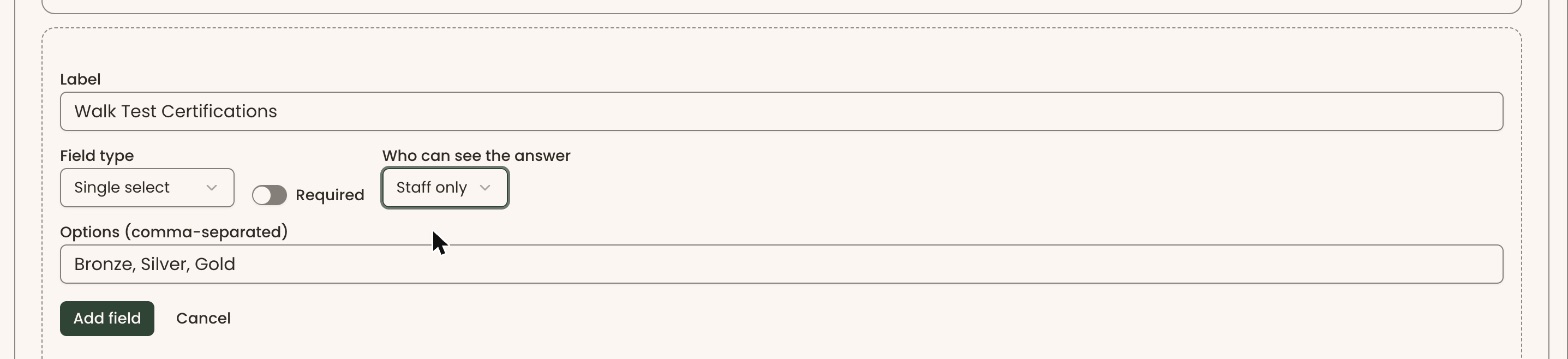
- In that box's "Label", type the field's name, for example "Certifications".
- In "Field type", choose one: "Short text", "Long text", "Single select", "Multi select", "Yes / No", "Number", "Date" or "Web link".
- For "Single select" or "Multi select", type the choices in "Options (comma-separated)", for example "Bronze, Silver, Gold".
- Turn on "Required" if every listing must fill it in.
- In "Who can see the answer", choose "Staff only", "Staff and the member" or "Anyone". Only "Anyone" shows it on the public page.
- Click "Add field". You'll see "Field added". That means it worked.
- To change a field later, edit it in its box. Then at the top right of the tab, click "Save field changes". You'll see "Fields saved".
To stop using a field, turn off "Enabled" in its box and click "Save field changes".
You can only delete a field nobody has filled in yet. Once any listing has an answer, the trash can icon is grayed out. Turn off "Enabled" instead.
Important: deleting a field can't be undone. It no longer shows anywhere.
- To delete a field nobody has filled in, click the trash can icon in its box. In the box that opens, click "Delete".
Add a listing for a member
Page: /dashboard/membership/directory
- Open the Directory page and click the "Listings" tab.
- At the top right of the "Listings" box, click "Add listing".
- A box opens called "Add listing". In "Search supporters", type the member's name or email.
- Click "Search".
- Click the member in the list. You'll see "Listing created", and a box called "Edit listing" opens. The new listing starts unpublished.
- Fill in the listing (see "Edit a listing", from step 3).
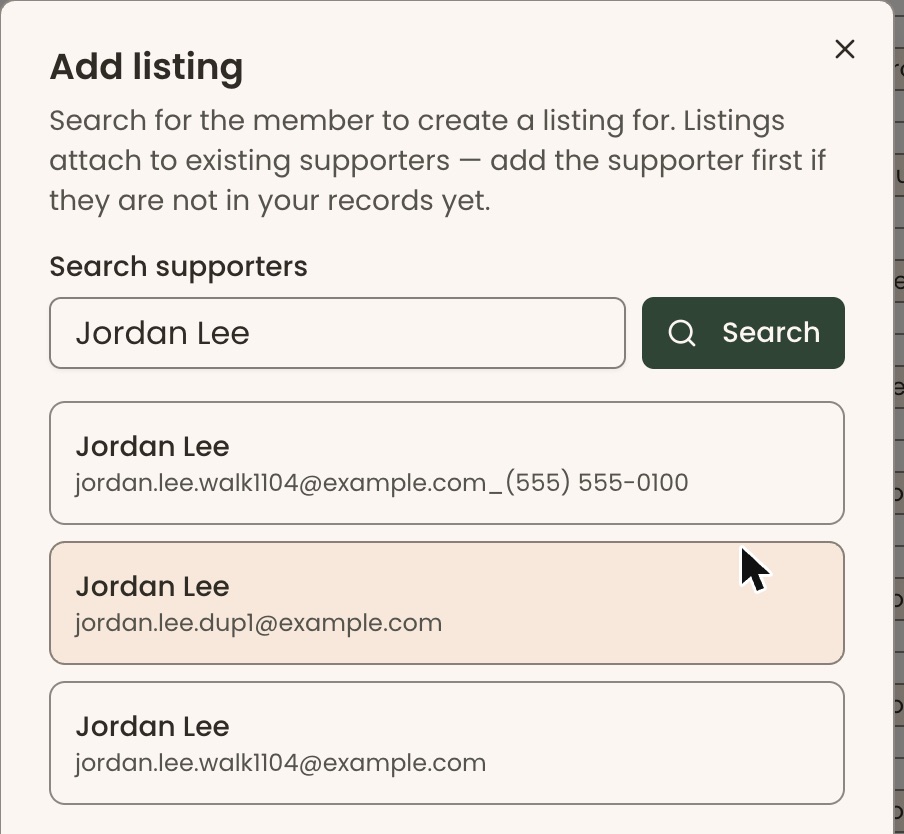
If you see "No supporters found. Try a different name or email.", the person isn't in your records yet. Add them as a supporter first (see Add a supporter or a contact, and move people between Supporters and Contacts). If you see "A directory listing already exists for this supporter", find their listing in the list and edit it.
Edit a listing
Page: /dashboard/membership/directory
- On the "Listings" tab, find the listing. To search, type in "Search business, supporter or contact…" above the list.
- At the far right of the row, click the pencil icon. A box opens called "Edit listing".
- To add a logo, click "Upload logo" and choose a PNG, JPEG or WebP file up to 2 MB. You'll see "Logo uploaded". A headshot works the same way with "Upload headshot". The headshot is a photo of the contact person, shown with their name.
- In "Display name", type the business name. It starts with the member's own name. This is the name on the public page.
- In "Categories", check the box beside each category the business belongs in, up to your "Categories per listing" number. The line under the list says how many you have chosen.
- Fill in any of the other boxes: "Year founded", "Tagline", "Contact name", "Contact title", "Description", "Website", "Public phone", the address, and the social media links.
- In "Email for directory messages", type where visitors' messages should go. It is never shown on the public page.
- Fill in any of your own fields below those.
- Near the bottom, turn on "Published" to show the listing on the public page. The member must also have an active membership.
- At the bottom right of the box, click "Save changes".
- You'll see "Listing saved". That means it worked.
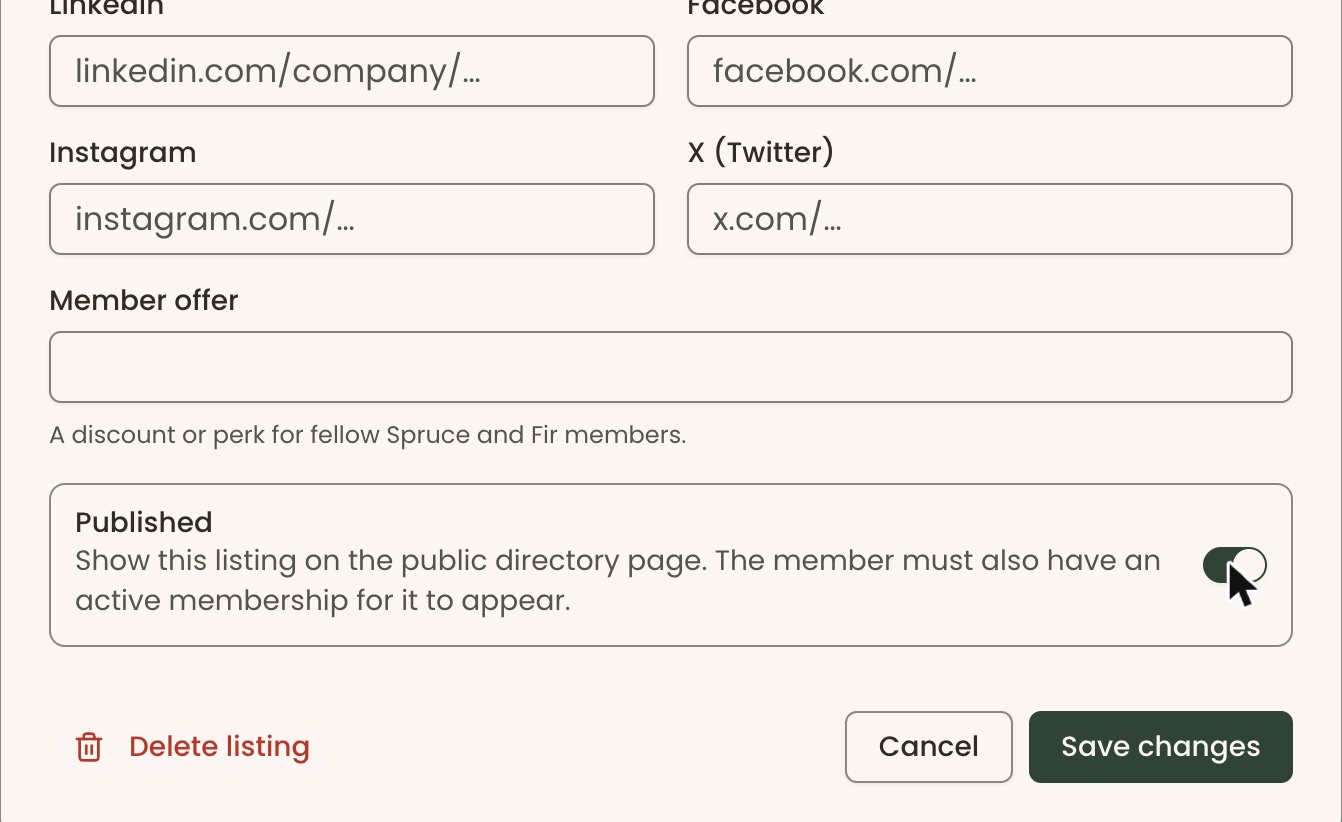
If a box shows a message in red, such as "Display name is required." or "Enter a valid email address.", correct it and save again.
What the "Status" column means
- Published: showing on the public page.
- Unlisted: the member qualifies, but "Published" is off.
- Hidden — membership lapsed: the member's membership ended and the grace period is over. It shows again when they renew.
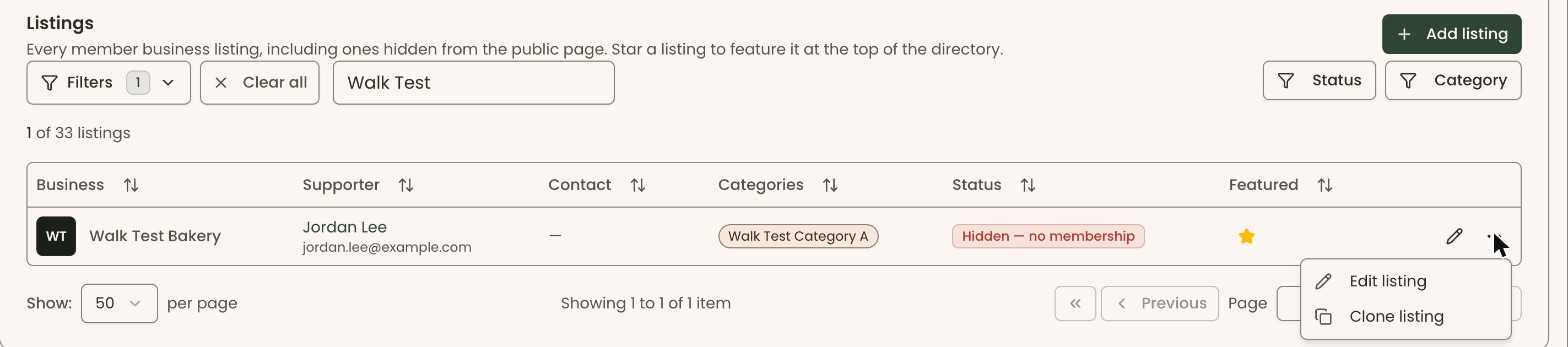
- Hidden — no membership: the supporter has no active membership.
To narrow the list, use the "Status" and "Category" buttons at the right, above the table. "Clear all", beside the search box, removes the filters.
Feature a listing
Featured listings show at the top of the public page.
- On the "Listings" tab, in the "Featured" column, click the star on the listing's row.
- The star fills in yellow. That means it worked. Click it again to stop featuring the listing.
Give a colleague of a member their own listing ("Clone listing")
Use this when two people from the same business both want a listing.
Important: cloning adds the new person to the member's membership as a connected member. If nobody in your records has their email, a new supporter record is created.
- On the "Listings" tab, at the far right of the listing's row, click the three dots (⋯).
- Click "Clone listing". A box opens called "Clone listing".
- Type the person's "First name", "Last name" and "Email". "Phone (optional)" can be left blank.
- Click "Clone listing" at the bottom right.
- You'll see "Listing cloned". That means it worked. The new listing has the same business details. The contact details, headshot and message email start blank, and it starts unpublished.
Share the public directory page
Page: /forms/directory/<orgSlug>
- Open the Directory page. You are on the "Settings" tab.
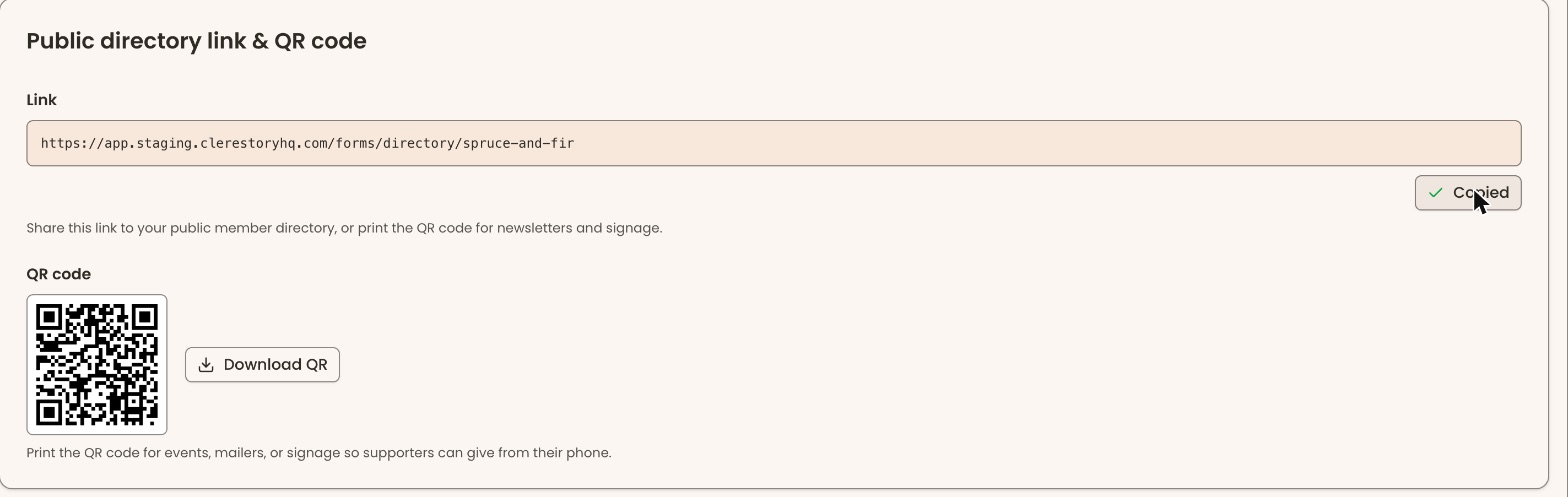
- Scroll down to "Public directory link & QR code".
- Under the "Link" box, at the right, click "Copy" to copy the page's web address. It reads "Copied" for a moment. Paste it in an email or on social media.
- Under "QR code", click "Download QR" to save a QR code picture for newsletters or signs.
- To put the directory inside your own website, scroll to "Embed code". Under "Iframe snippet", click "Copy" and give the code to whoever edits your website.
What visitors see
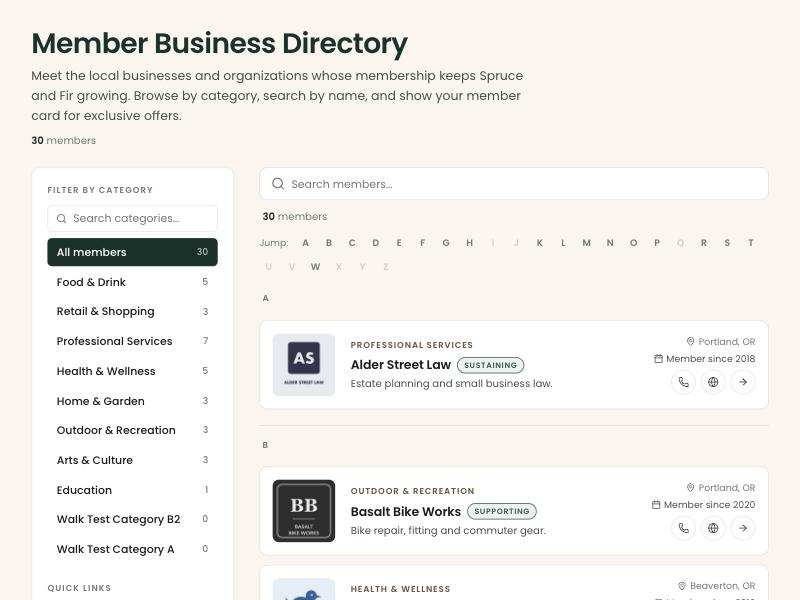
- The page shows your page title and intro text, then a list of published listings.
- Visitors can search with "Search members…", or choose a category under "Filter by category". "All members" clears every filter.
- Clicking a business opens its details: contact, address, phone, website and links.
- A visitor can send the business a message from its details. The message goes to the "Email for directory messages" address. The visitor never sees that address.
If the directory is turned off, the public page doesn't open.
Special cases
- Members manage their own listing from the supporter portal once the directory is on. See Add or edit my business listing.
- Grace period: if your membership levels give a longer grace period than the directory's, the longer one is used.
- Turning the directory off hides the public page. Listings aren't deleted.
Buttons to avoid
- "Delete listing", at the bottom left of the "Edit listing" box, removes the listing for good. To take it off the public page for now, turn off "Published" instead.
- "Cancel" in any of these boxes closes it without saving.
If you make a mistake
- Published by mistake: edit the listing, turn off "Published" and click "Save changes".
- Deleted a listing: this can't be undone in the screens. Add the listing again with "Add listing" and fill it in.
- Deleted a category or field: this can't be undone. Add it again. Listings must be put back in a re-added category by hand.