


Who can do this: Owner, Administrator, Finance, Fundraiser. Programs and Viewer users can open Data Management but can't run an import.
Quick steps: Data Management › "Start Import" › "Data Type" › "Choose file" › "Continue" › "Continue" › check "Import Preview" › "Continue to Import" › (if asked) resolve conflicts › "Continue with Import" › "Import Completed".
Before you start
- Your role must be Owner, Administrator, Finance or Fundraiser.
- A supporter is anyone in your records who has given, joined or registered.
- Import supporters first. Gifts and memberships find their supporter by email or Clerestory ID, so the supporters must already be there. Import in this order:
- Supporters
- Memberships and donations
- Payments, then payment tags and soft credits
- Membership levels must already exist in Clerestory. The file names them, for example "Contributing Member". See Set up membership levels: add, edit, duplicate, stop offering and delete. For a members-only file, see also Import or export members.
- Have to hand: your file, saved as CSV, Excel or JSON, up to 10MB, with the columns below.
| File | Required columns |
|---|---|
| Supporters | email, first_name, last_name, street, city, zip, country |
| Memberships | supporter_first_name, supporter_last_name, payment_amount, start_date, expiration_date, and membership_tier_name (or membership_tier_id) |
| Donations | supporter_first_name, supporter_last_name, payment_amount, donation_type (one-time or recurring), initial_donation_date |
| Payments | amount, currency, status, category |
Also include supporter_email on membership and donation files, so each row finds the right person.
Formats:
- Money in dollars, for example 100.00, not 10000.
- Phone numbers like +15551234567. "555-123-4567" is rejected.
- Dates like 2025-01-15.
- Yes/no as true or false, 1 or 0, or yes or no.
- Membership levels by name. Upper or lower case doesn't matter.
- Older files with
donor_column names, such asdonor_first_name, still import.
Import a file
Page: /dashboard/data-management/import
- In the left-hand menu, under "Tools", click Data Management.
- In the box headed "Import Data", click "Start Import" at the bottom. (Or, at the top of any page, click "New", then "Import a spreadsheet".)
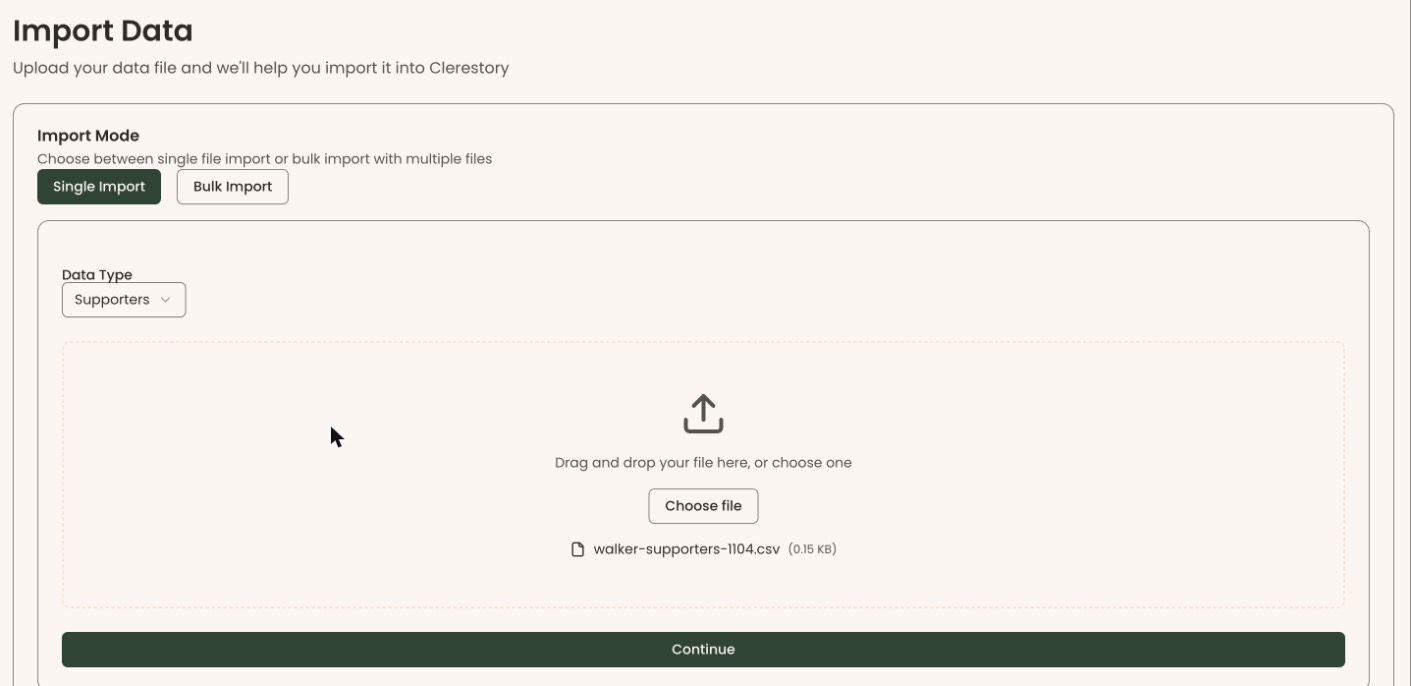
- The page is headed "Import Data". In the "Import Mode" box, leave "Single Import" selected.
- Click "Data Type" and choose what your file holds, for example "Supporters".
- Drag your file onto the dashed box, or click "Choose file" and pick it from your computer.
- The file's name and size appear under "Choose file". Click "Continue", the wide button below the box.
- The next screen says "Field mapping detected. Review and adjust if needed." There's nothing to change here. Click "Continue", next to "Back". (If "Import Preview" opens straight away instead, go on to step 8.)
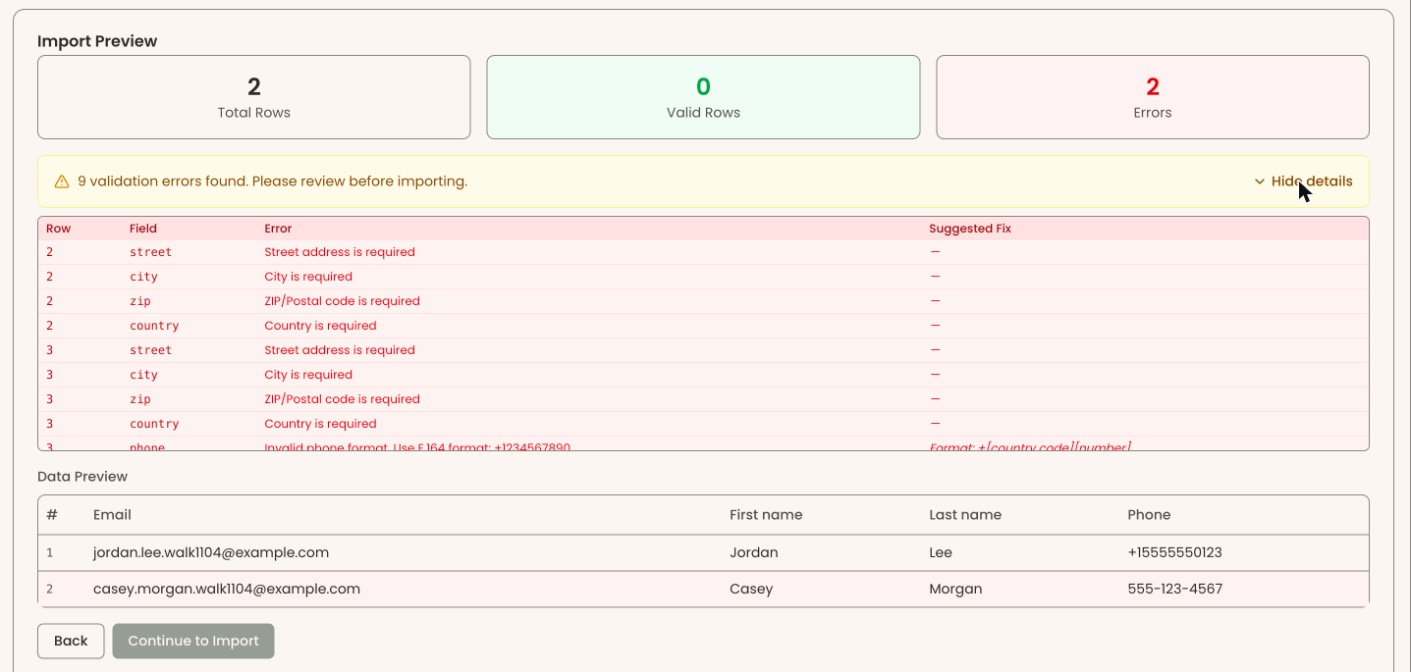
- "Import Preview" shows "Total Rows", "Valid Rows" and "Errors". If there are errors, a yellow line says how many. Click "Show details", at its right, to see each problem's "Row", "Field", "Error" and "Suggested Fix".
- If there are errors, you can fix them in your spreadsheet and start again. Or carry on, and only the valid rows are imported. If some rows match records already in Clerestory, a line says, for example, "1 conflicts detected. You'll be able to resolve them next." Under "Data Preview" you can check each row.
Important: If no rows match records already in Clerestory, clicking "Continue to Import" starts the import straight away. It can't be undone in the screens.
- Click "Continue to Import".
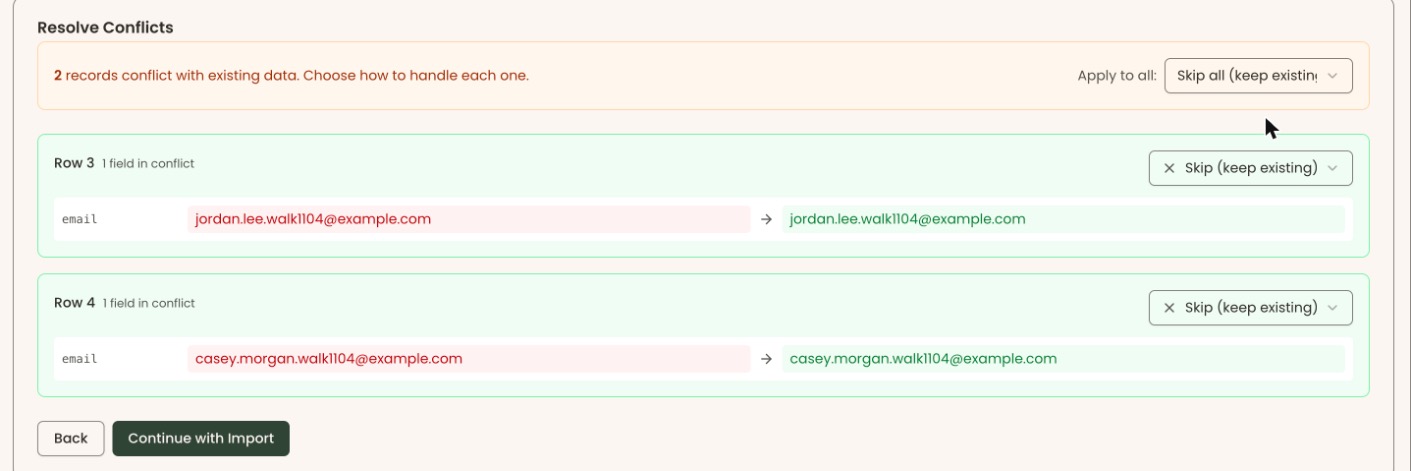
- If some rows match existing records, a "Resolve Conflicts" screen appears instead. It says how many records "conflict with existing data". For each "Row", choose what to do, or set them all at once with "Apply to all:":
- "Skip (keep existing)": leave the record in Clerestory as it is.
- "Update (merge incoming)": fill in the record from your file.
- "Create new record": add a separate record. ("Apply to all:" offers "Skip all (keep existing)", "Update all (merge)" and "Create all as new".)
Important: Clicking "Continue with Import" starts the import. It can't be undone in the screens.
- Click "Continue with Import", at the bottom left, next to "Back". It stays grayed out until every conflict has a choice, with the line "Please resolve all … remaining conflict to continue."
- You'll see "Importing data..." while it runs.
- You'll see "Import Completed", with "Successfully Imported", "Unchanged or skipped" and "Failed" counts. That means it worked.
- Click "Import Another File" for the next file, or "Done". To check the records, open them from the left-hand menu, for example Supporters, then All Supporters.

Import several files at once
- On the "Import Data" page, in "Import Mode", click "Bulk Import".
- Under "Add File to Bulk Import", click "Data Type" and choose the type, choose the file, and click "Add File".
- Repeat for each file. They're listed under "Files to Import".
- Continue through the preview and the import as in "Import a file".
What the labels mean
- Total Rows: rows Clerestory found in your file.
- Valid Rows: rows that passed the checks and can be imported.
- Errors: problems found. A row can have more than one.
- Successfully Imported: rows added or updated.
- Unchanged or skipped: rows that matched an existing record and were left alone. This isn't a failure.
- Failed: rows that couldn't be imported. Click "Failed Records" to see each one's "Row", "Record", "Field" and "Error".
Special cases
- "Continue to Import" is greyed out. No rows are valid. Fix the file and upload it again.
- "Failed to validate file". Clerestory couldn't read the file. Check it's CSV, Excel or JSON and under 10MB.
- "Import failed". You're returned to the preview. Try "Continue to Import" again.
- Re-importing a payment export. The first column,
clerestory_payment_id, updates those payments instead of adding new ones. An unchanged re-import adds nothing. - Payments taken through Stripe. An import never changes the amount or fee of a payment Stripe processed.
- Refunds. An import never records a refund. Record it on the original payment in Clerestory.
- Pledges. Switch Pledges on in Settings, then Features, first. Import "Pledges", then "Pledge schedules", "Pledge payments and opening balances", then "Pledge write-offs".
If you make a mistake
- Some rows failed: open "Failed Records" and click "Export Failed Rows" to download them. Fix them in your spreadsheet and import that file.
- Imported the wrong file, or chose "Create New Record" by mistake: this can't be undone in the screens. There's no button that reverses an import. The records it added have to be corrected one by one.