


Who can do this: Emailing: Owner, Administrator and Programs. Exporting: Owner, Administrator, Finance and Fundraiser. Other roles don't see the "Send email" or "Export" buttons. Front desk users see neither.
Quick steps: Events › Events › the event › "Orders" tab › "Send email" › write it › "Next: when and who" › "Send now" › "Send to … people?". To export: "Orders" or "Attendees" tab › "Export".
Before you start
- To email, you need an Owner, Administrator or Programs login. To export, an Owner, Administrator, Finance or Fundraiser login. Only an Owner or Administrator can do both.
- The event needs at least one order.
- A buyer is the person who paid for an order. A guest, or attendee, is each person named on a ticket. One buyer can bring several guests.
- Have your email's subject line and message ready.
Email the event's buyers
Page: /dashboard/campaigns/<campaignId>?tab=attendees
- In the left-hand menu, under "Fundraising", click "Events". Then click "Events" in the list that opens below it.
- In the list of events, click the event's name.
- Click the "Orders" tab in the row of tabs near the top.
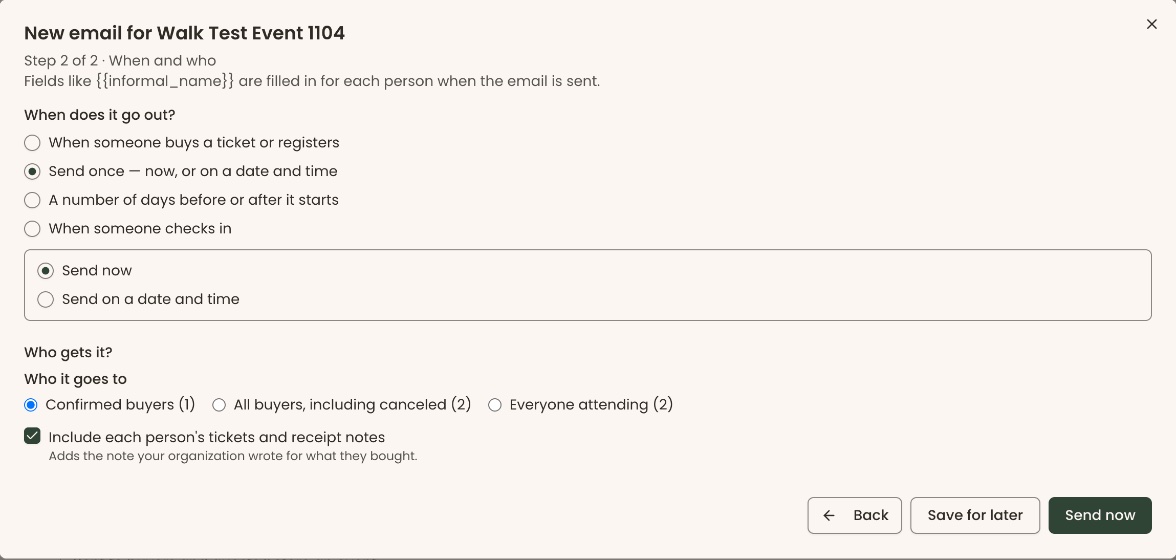
- At the right of the "Orders" heading, between "Check-in scanner" and "Export", click "Send email" (with an envelope). The "Emails" tab opens, with a box called "New email for …".
- The box says "Step 1 of 2 · Write it". In "Subject line", type the subject.
- In "Message", write your email. To add each person's name, pick it from "Insert field".
- Check the preview on the right. Click "Phone" above it to see how it looks on a phone, and "Computer" to switch back.
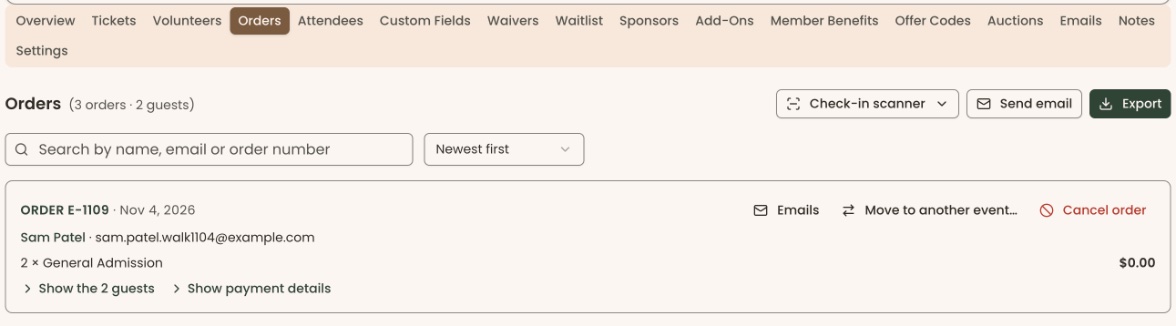
Important: "Send me a test" emails a test copy of this email to you. It goes to no one else and doesn't save the email.
- To see it in your own inbox first, click "Send me a test". You'll see "Test email sent to …".
- Click "Next: when and who". The box now says "Step 2 of 2 · When and who".
- Under "When does it go out?", "Send once — now, or on a date and time" is the usual choice.
- Choose "Send now", or "Send on a date and time" and pick the day and time.
- Under "Who gets it?", check "Who it goes to". It starts on "Confirmed buyers", with the number of people in brackets. You can pick "All buyers, including canceled" or "Everyone attending" (every guest with an email address) instead.
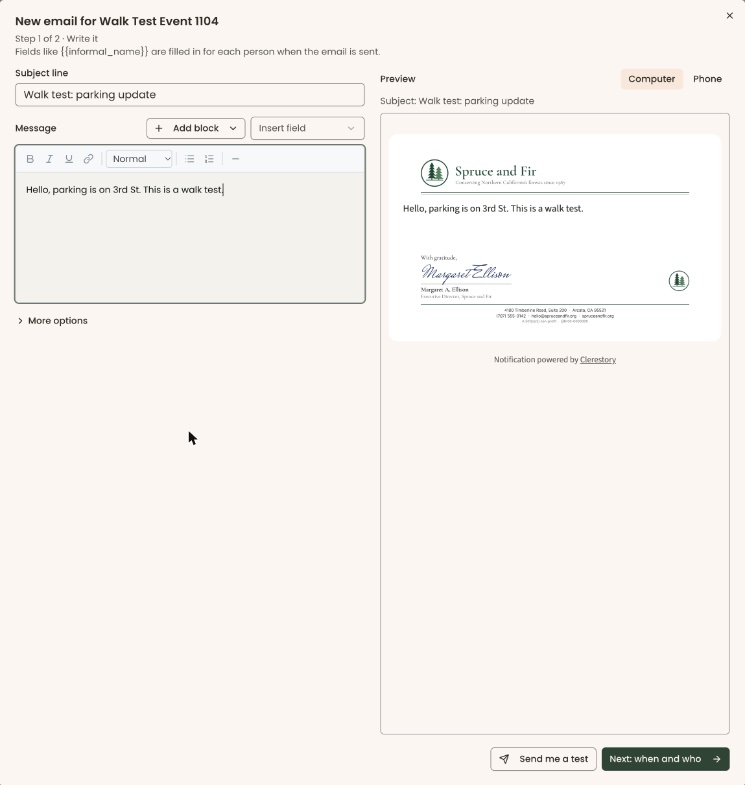
Important: "Send now" sends the email to everyone shown, right away. It can't be recalled.
- Click "Send now". The button changes to "Send to … people?" (in red). Click it again to send.
- You'll see "Sending to … people.". That means it worked. For a later time, the button says "Schedule" and you'll see "Scheduled for …".
If it didn't work, you'll see "We couldn't send the email." or the reason. If you click "Next: when and who" with no subject, you'll see "An email needs a subject line."
To keep the email without sending it, click "Save for later". You'll see "Saved. Send it from the list whenever you're ready."
Email the people on one ticket type
Use this for one session or time slot, such as "Friday 2 PM tour".
Page: /dashboard/campaigns/<campaignId>?tab=people
- Open the event, as in steps 1 and 2 above.
- Click the "Attendees" tab in the row of tabs near the top.
- Next to "Ticket type", click the box showing "All ticket types" and choose the ticket type. Each choice shows how many people hold it, in brackets.
- At the top right, click "Email these people". The "Emails" tab opens with a new email.
- Follow steps 5 to 14 of "Email the event's buyers". In step 2 of the box, "Who it goes to" starts on "Everyone attending" and you'll see "Only people with the ticket type you chose."
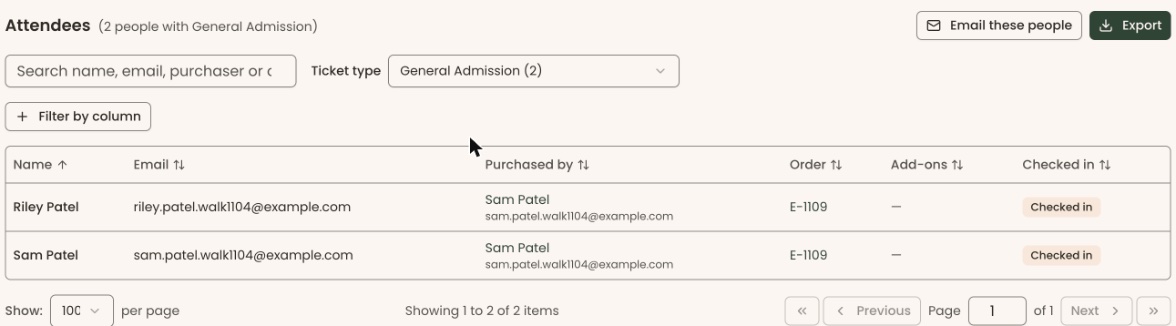
The email reaches everyone holding that ticket type: its buyers, and its guests who have their own email address. Each address gets one copy.
If you typed in the search box, the button says "Email everyone with …" instead. The search narrows the list on screen, not who gets the email.
Export the guest list
Exporting saves a spreadsheet file (a CSV file, which opens in Excel, Numbers or Google Sheets) with one row per guest.
Page: /dashboard/campaigns/<campaignId>?tab=people
- Open the event, as in steps 1 and 2 of "Email the event's buyers".
- Click the "Attendees" tab in the row of tabs near the top.
- To export only one ticket type, pick it next to "Ticket type". To export everyone, leave "All ticket types".
- At the right of the "Attendees" heading, click "Export".
- You'll see "Attendees exported", and the file downloads to your computer. That means it worked.
The file's columns are "Order", "First Name", "Last Name", "Email", "Ticket Type", "Checked In", "Add-Ons", "Purchased By", "Purchaser Email" and "Seat Add-Ons", then your event's questions. Events with seating also get "Table Assignment".
The "Attendees" tab exports what the list is showing: if you searched or picked a ticket type, only those people are in the file. The "Orders" tab also has an "Export" button, at the top right, which saves every guest on the event.
If it didn't work, you'll see "The attendee list could not be exported." Try again.
Special cases
- The "Export" button is grayed out while there are no guests.
- "Email these people" is grayed out when nobody on the list has an email address.
- Emails you have sent are listed further down the "Emails" tab. See An event's emails: add your own, and check the automatic ones.
Buttons to avoid
- In step 13, the first click on "Send now" only asks for confirmation. The second click, on the red "Send to … people?", sends. Click "Back" instead if you're not ready.
If you make a mistake
- An email sent with "Send now" can't be recalled. Send a short correction to the same group.
- An export only downloads a file. Delete the file from your computer if you don't need it.