


Who can do this: Owner, Administrator, Finance, Fundraiser, Programs and Viewer can run reports. Front desk users don't see Reporting. Some buttons on a report need more than that; see "Who sees which buttons".
Quick steps: Reporting › Templates › "Run Report →" on a card › date range button › "Add Filter" › "Apply Filter" › click a column heading to sort › "Columns" › "Save as Template" › "Save".
Before you start
- Your role must be anything except Front desk.
- A report is a table of your records that answers one question, such as "who are my active members?". A built-in report is one Clerestory provides.
- A filter is a rule that hides rows you don't want, such as "Membership level is Family".
- Know the date range you want, for example this fiscal year.
Open a report
Page: /dashboard/reporting/templates
- In the left-hand menu, under "Tools", click Reporting to open its list.
- Click Templates.
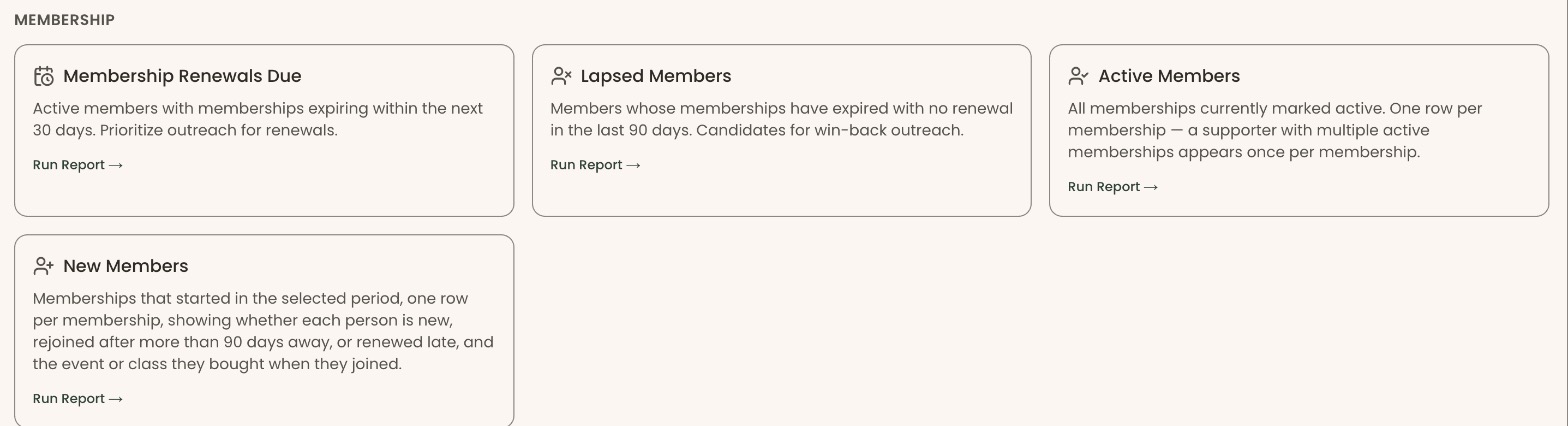
- The page is headed "Report Templates". Under "Built-in Reports", reports are grouped by subject.
- Find the report you want, for example "Active Members" under "Membership".
- Click "Run Report →" at the bottom of its card.
Page: /dashboard/reporting/templates/<templateId>
- The report opens with its name at the top and the results table below. That means it worked.
The built-in report groups
| Group | Examples |
|---|---|
| Membership | Active Members, Lapsed Members, Membership Renewals Due, New Members |
| Dues | Active Dues Members, Dues Past Due, Dues Collection by Period |
| Supporters & Giving | People, Top Supporters, LYBUNT, SYBUNT, First-Time Supporters, Year-End Giving Summary |
| Events | Event Registrations, Event Attendees, Event Add-Ons, Event Sponsors |
| Classes | Class Registrations, Class Capacity Overview, Waivers: Outstanding |
| Admissions | Admission Visitor Summary, Admission Revenue by Payment Method |
| Transactions | All Transactions, Revenue Summary, Payout Reconciliation, Refunds and Disputes, Treasurer's Report |
Every organization sees every built-in report, even for features it doesn't use. Those come back empty.
Change the date range
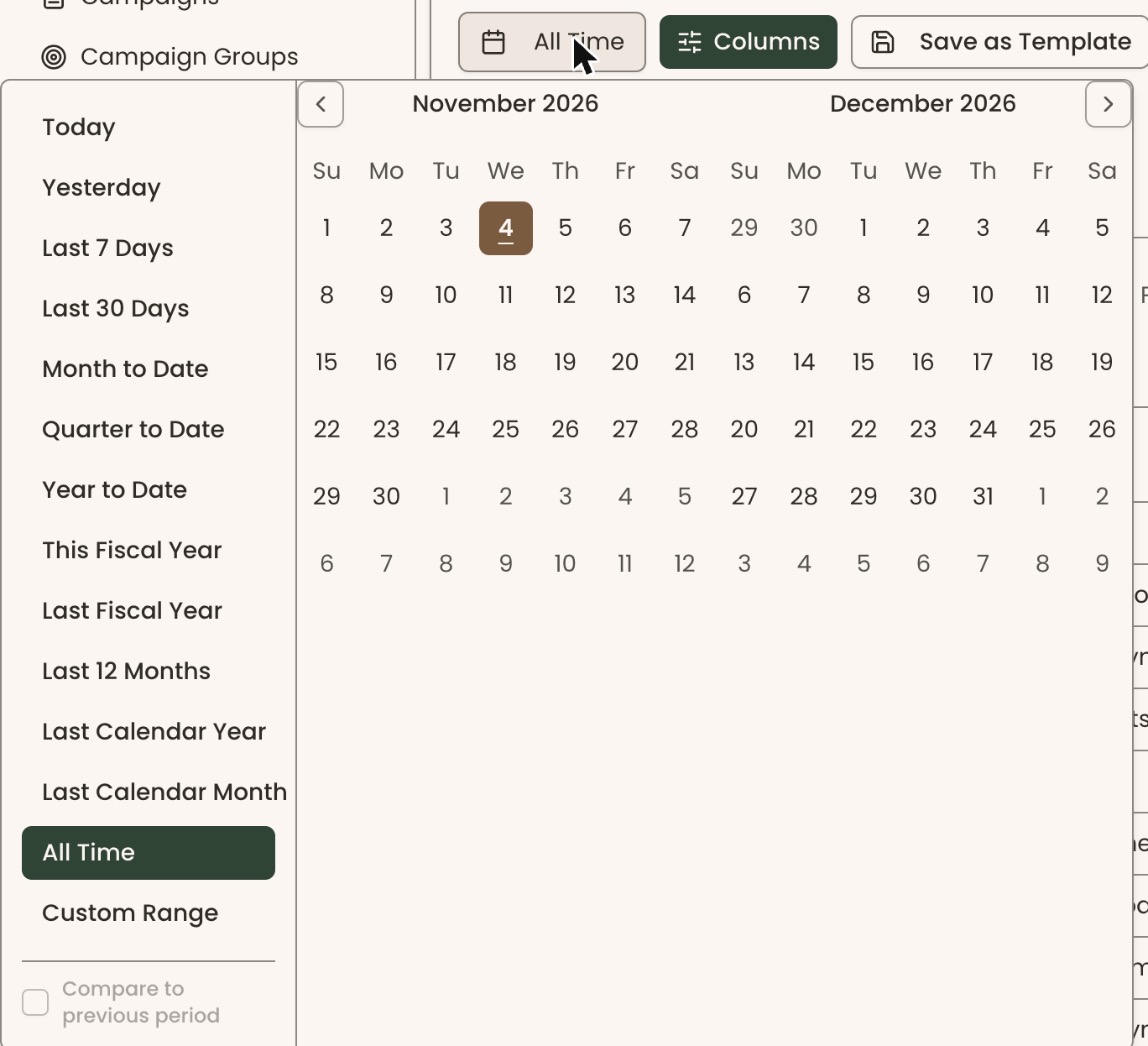
- Find the row of buttons under the report's name. The first button on the left has a calendar icon and shows the current range, for example "Last 30 Days" or "Select date range".
- Click it. A list of ranges opens, headed "Select Date Range" on a phone.
- Click a range, for example "Year to Date", "This Fiscal Year", "Last Calendar Year" or "All Time".
- For your own dates, click "Custom Range", then click the start day and the end day on the calendar.
- The table reloads, and the button shows the new range. That means it worked.
Add a filter
- Under the row of buttons, below any filter tags, click "Add Filter". It has a plus sign (+).
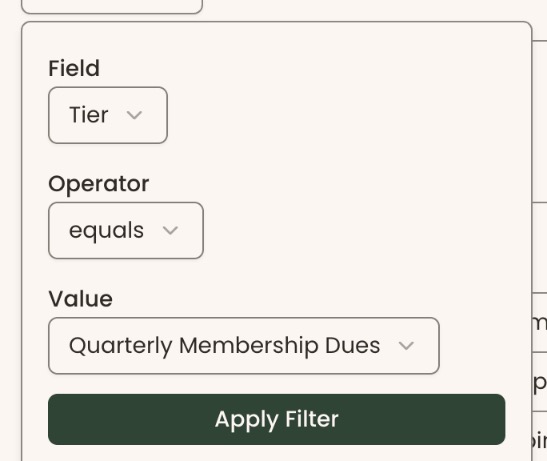
- Click "Field" and choose the column to filter on. The list shows only columns this report can filter.
- Click "Operator" and choose how to compare. For a field picked from a list it starts on "equals". For a date it starts on "is between".
- Choose or type the value. Dates use a date picker. Other fields show "Select a value" or "Filter value".
- Click "Apply Filter".
- The filter appears as a tag above the table, and the table shows only matching rows. That means it worked.
To remove a filter, click the small x at the right of its tag.
Sort the table
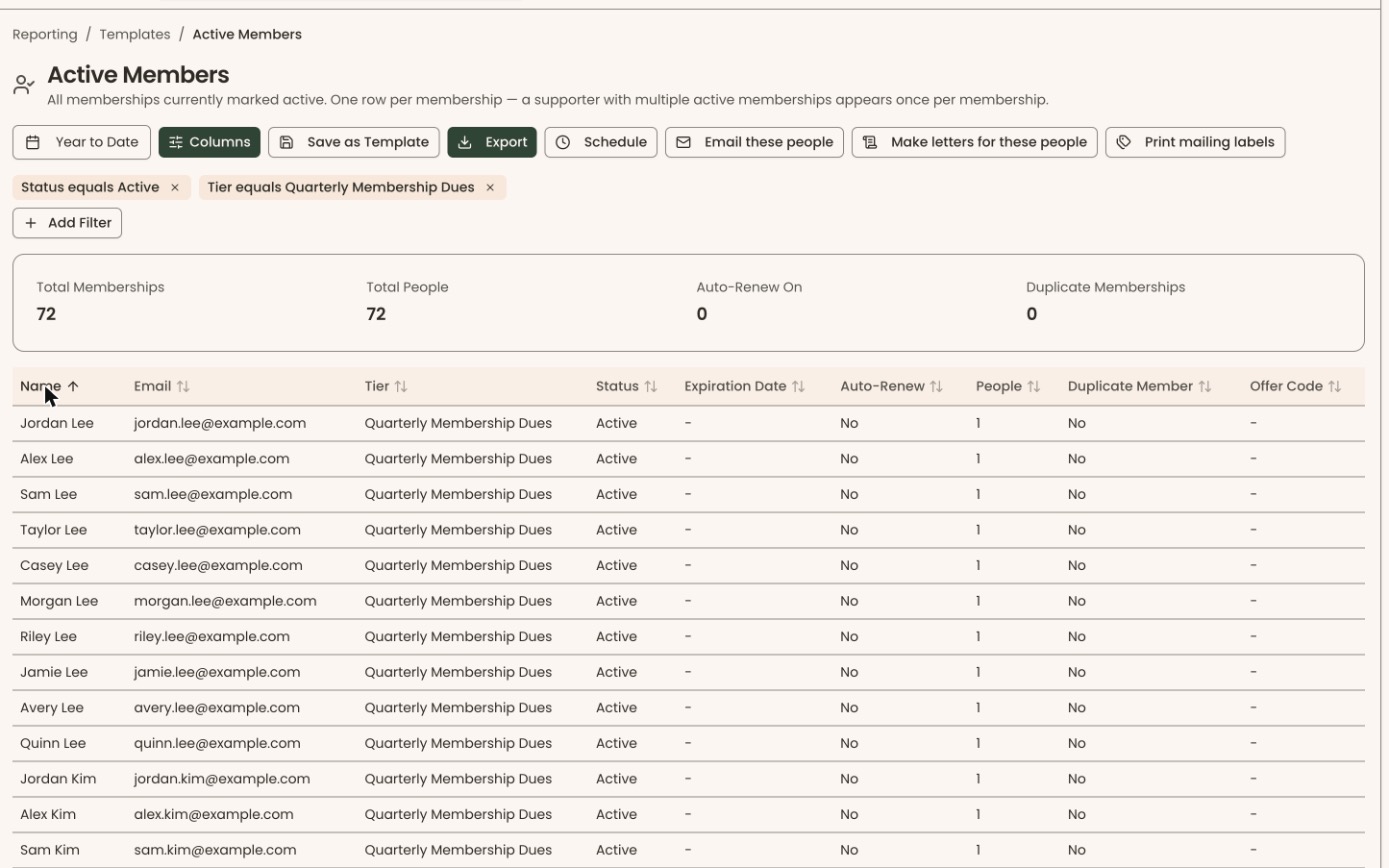
- Click a column heading to sort by that column.
- Click the same heading again to reverse the order.
Choose and order columns
- In the row of buttons under the report's name, click "Columns".
- Under "Show / Hide Columns", check a column to show it, or uncheck it to hide it.
- To move a column, under "Column Order", click the up or down arrow beside it.
- The table updates as you go. Click outside the list to close it.
One row per person or per household
Some reports show "Rows:" above the table, with a menu. Click it and choose "One row per person", or "One row per household or business" to combine everyone in a household into one row.
Save your version
- Set the dates, filters and columns the way you want.
- In the row of buttons, click "Save as Template".
- A box opens headed "Save as Template". Click in "Template Name" and type a name, for example "Family members this year".
- Click "Save", at the bottom right of the box.
- You'll see "Template "[name]" saved successfully". That means it worked.
- It now appears on the "Report Templates" page under "Your Saved Reports", at the bottom of the page, marked "Saved".
If you see "Failed to save template", nothing was saved. Try again.
Who sees which buttons
| Button | Who sees it |
|---|---|
| "Save as Template", "Schedule" | Owner, Administrator, Finance, Fundraiser |
| "Export" ("Download as CSV", "Download as PDF") | Owner, Administrator, Finance, Fundraiser |
| "Email these people", "Make letters for these people", "Print mailing labels" | Owner, Administrator, Fundraiser, Programs, on reports where every row is a person |
| "Assign an owner or stage" | Owner, Administrator, Fundraiser, on the "People" report |
What the labels mean
- Report Templates: the list of reports. Clerestory makes the built-in ones. "Your Saved Reports" are versions your team saved.
- Run Report →: opens the report with its standard settings.
- Filter tags: each tag above the table is one rule. A row must match all of them to show.
- Summary box: some reports show totals above the table. Common ones:
- "Total Memberships": the number of memberships. One person holding two counts as 2.
- "Total People": members plus everyone their membership covers. Each person counts once.
- "Auto-Renew On": memberships set to renew automatically.
- "Gross", "Refunds", "Fees", "Net": money taken, money returned, fees taken off, and what's left. "Fees" can be split into "Card Processing", "Clerestory Platform Fee" and "Stripe Account Fees".
- "Total Collected", "Total Outstanding", "Collection Rate": for dues, what's been paid, what's still owed, and the share paid.
- "No results match your filters. Try adjusting your date range or filters." Nothing matches. Widen the date range or remove a filter.
Buttons to avoid
- "Email these people" starts an email to everyone in the report. Check your filters first.
If you make a mistake
- Wrong filter: click the small x on its tag.
- Wrong columns: click "Columns" and tick them again.
- Saved a report you didn't want: see "Delete a saved report" below.
Delete a saved report
- In the left-hand menu, click Reporting, then Templates.
- Scroll to the bottom of the page. Under "Your Saved Reports", find the report. Click the red trash can icon on its card.
- A box opens headed "Delete "[name]"?".
Important: Clicking "Delete" permanently deletes your saved report. It can't be undone. Built-in reports can't be deleted.
- Click "Delete", or "Cancel" to keep it.
- You'll see "Template deleted". That means it worked.