


Who can do this: Owner, Administrator, Finance and Fundraiser. Other roles don't see the "Import" or "Export" buttons on the Member List.
Quick steps: Export: Membership › "Member List" › "Export" › choose format, dates and fields › "Start Export" › "Download". Import: Membership › "Member List" › "Import" › upload the file › follow the import steps.
Before you start
- You need one of the roles above.
- For an import: the people in your file should already be in Clerestory as supporters, and the membership levels must already exist. A supporter is anyone in your records who has given, joined or registered. A level is one kind of membership you sell, for example "Family". See "Set up membership levels: add, edit, duplicate, stop offering and delete".
- For an import: have your file ready as CSV, Excel or JSON, up to 10MB.
Export your memberships
Page: /dashboard/membership/members
- In the left-hand menu, click "Membership". The group opens.
- Click "Member List". The page is headed "Membership List".
- At the top right of the page, click "Export". It has a download arrow icon.
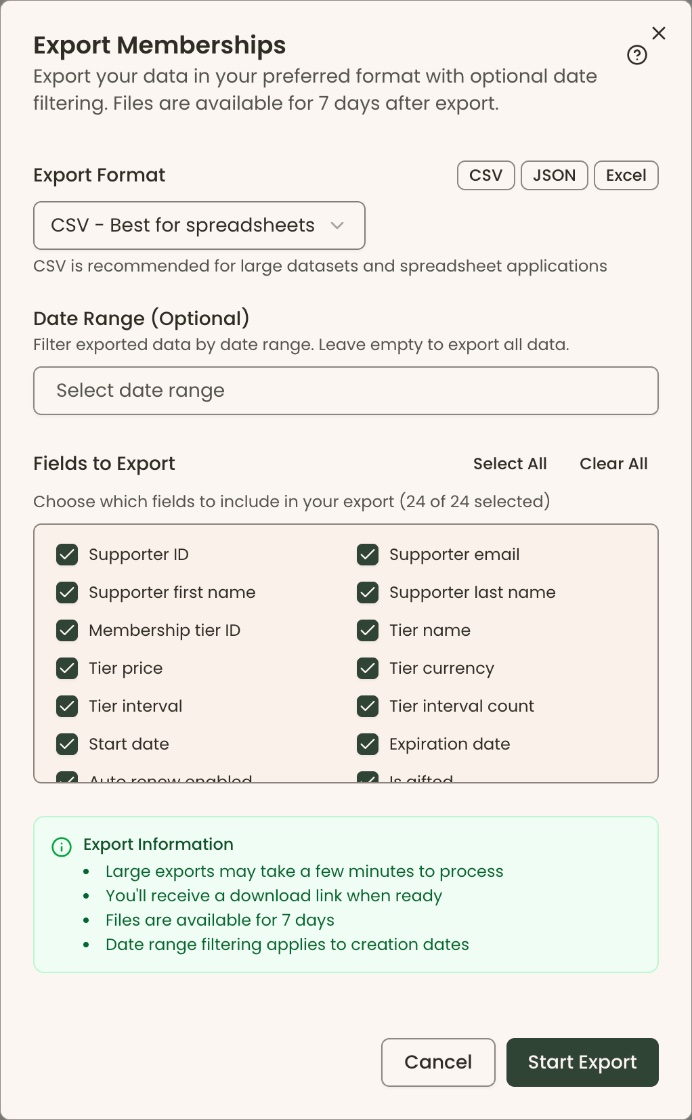
- A box opens called "Export Memberships".
- Click the "Export Format" list and choose "CSV - Best for spreadsheets", "JSON - Best for programmatic access" or "Excel - Best for manual editing". CSV is already selected.
- Under "Date Range (Optional)", pick dates to limit the export, or leave it empty to export everything. The range filters by the date each record was created.
- Under "Fields to Export", every column is already checked. Uncheck any you don't want. Use "Select All" or "Clear All" to change them all at once.
- Click "Start Export" at the bottom right.
- A bar shows "Exporting..." while the file is made. Large exports can take a few minutes.
- You'll see "Export ready!". That means it worked.
- Click "Download" to save the file.
- Click "Close".

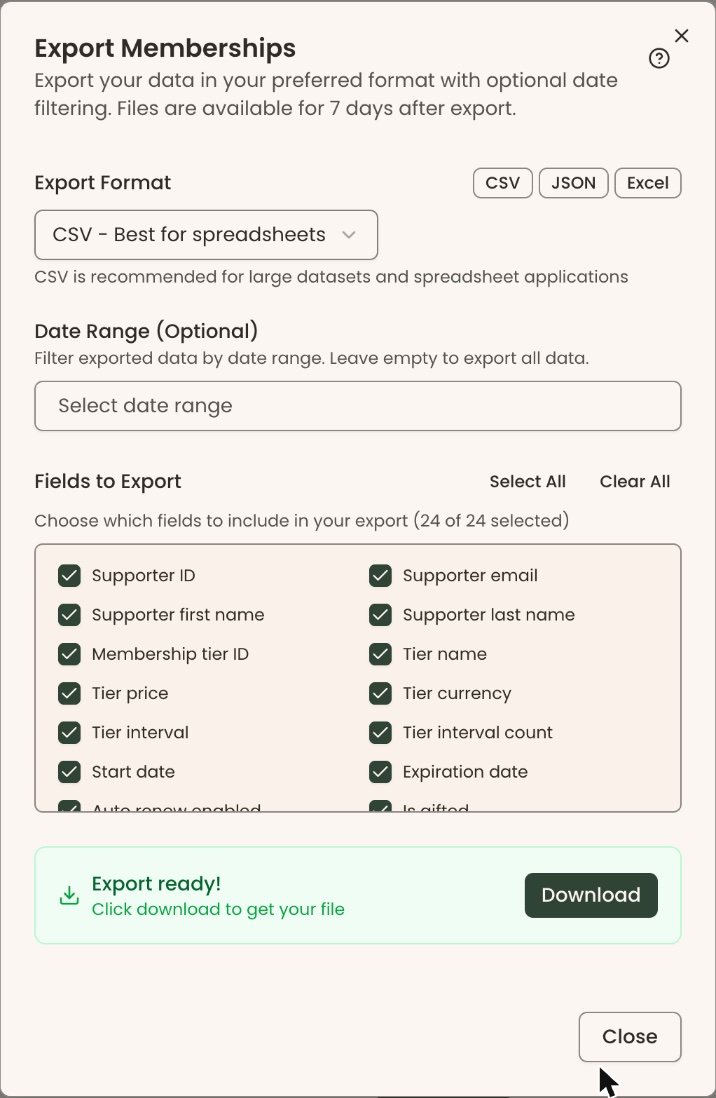
The download link works for 7 days.
Import memberships
Page: /dashboard/membership/members
- Follow steps 1 and 2 of "Export your memberships".
- At the top right of the page, click "Import". It has an upload arrow icon.
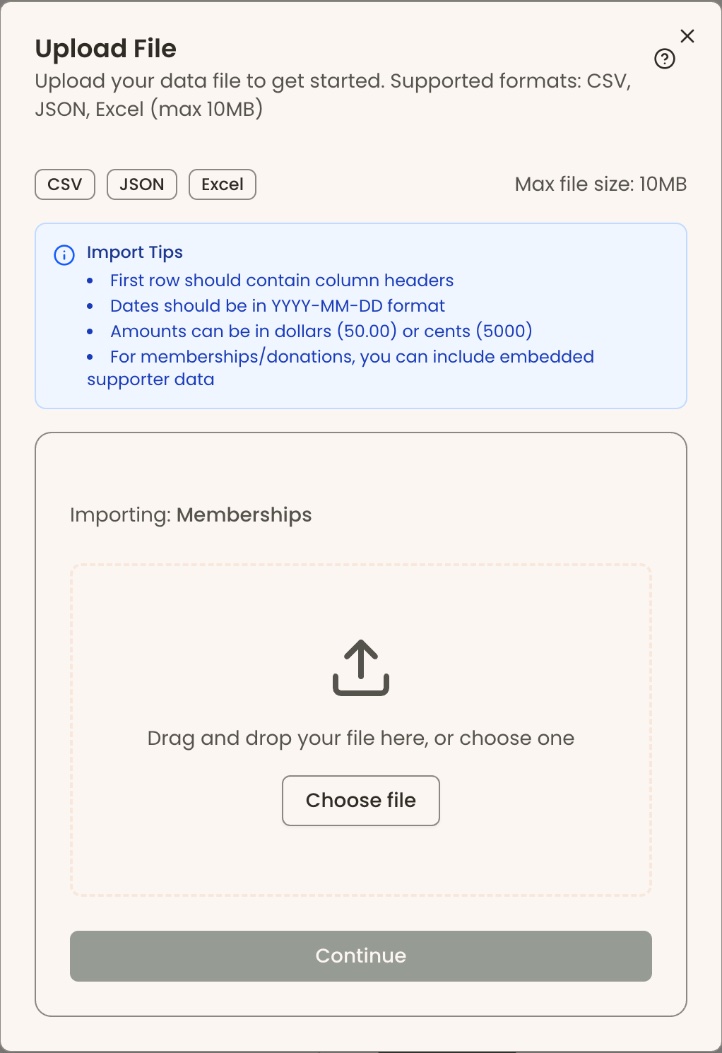
- A box opens called "Upload File". It says "Importing: Memberships".
- Drag your file onto the dashed box, or click "Choose file" and pick it from your computer. The file's name appears under "Choose file".
- Click "Continue", the wide button at the bottom of the box.
- The box changes to "Map Fields" and says "Field mapping detected. Review and adjust if needed." Click "Continue", next to "Back".
- The box changes to "Review Import". Under "Import Preview" you'll see "Total Rows". The box is narrow: scroll it sideways to see "Valid Rows" and "Errors".
- Under "Data Preview", check each row of your file.
Important: Clicking "Continue to Import" starts the import. It can't be undone in the screens, so check your file first.
- Click "Continue to Import", next to "Back".
- The box closes and you'll see "Successfully imported" with the number of rows, for example "Successfully imported 3 rows". That means it worked. The Member List refreshes.
- Check that the number matches the rows in your file. If it says fewer, some rows were not imported (see "Special cases").
A membership file needs supporter_first_name, supporter_last_name, supporter_email, payment_amount, start_date, expiration_date and membership_tier_name. Put amounts in dollars, for example 75.00, and dates as 2026-01-15.
Special cases
- The export ignores the Member List filters. Searching or filtering the list doesn't narrow the export. Use "Date Range (Optional)" in the export box instead.
- "Download link has expired. Please create a new export.": click "Start Export" again.
- "Export failed. Please try again.": close the box and start again. If it repeats, contact Clerestory support.
- "Import completed with errors": some rows didn't import. See "If you make a mistake" in the import guide.
- A row for someone who already has an active membership at the same level may not be imported. The message can still say "Successfully imported 0 rows", without saying why. Check the person's membership on the Member List.
- The "Import Tips" box says amounts can be in cents. Don't use cents. Put amounts in dollars, for example 75.00.
If you make a mistake
- Exported the wrong columns or dates: open "Export" again and make a new export. Nothing in Clerestory changes when you export.
- Imported the wrong file: this can't be undone in the screens. There's no button that reverses an import. Contact Clerestory support with the date and time you imported it.